Categories
Blue Highways Outdoors Overland travel

Adventure Rider Radio

If you haven’t found it yet, check out Adventure Rider Radio.  This is a podcast “radio” show about motorcycles and adventure travel produce by Jim and Elizabeth Martin from their home on Vancouver Island, British Columbia, Canada.

What a fantastic episode. It just so happens I was traveling through Central Washington State, catching up on the last several episodes on my new SENA 10U when Riding in Extreme Conditions Part 1 came on. For those that don’t know, Ellensburg is known as Washington’s windy city and home to one of the largest wind farm complexes in the region, Wild Horse Wind & Solar Facility. First part of Part 1? Wind!!! As David Hough was talking me through techniques for handling strong side winds I was able to practice them, REAL TIME!! It was almost like I was at a training session where David dialed up the wind and sent the class out after each “lesson”.

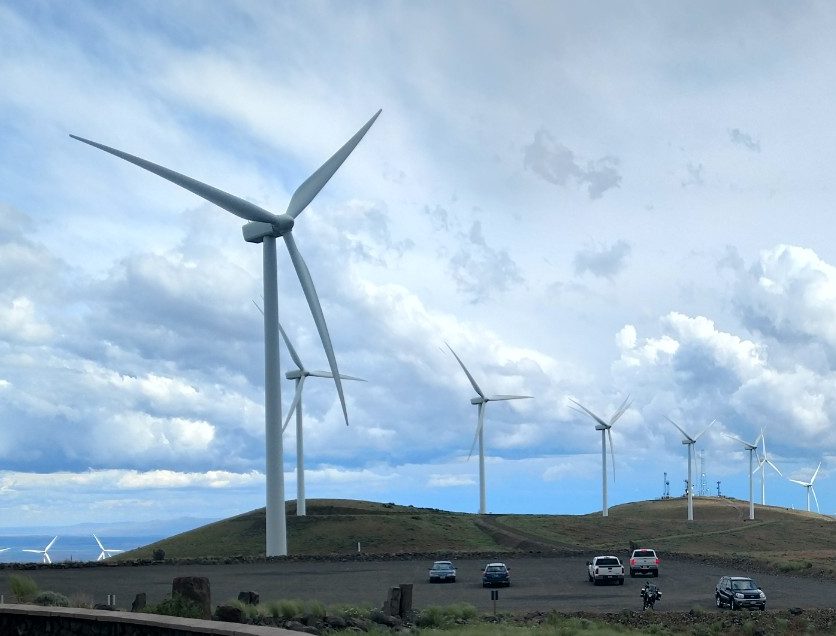
On my return trip, it was REALLY windy and having some coaching and practice on the way over it wasn’t too bad. I wasn’t tense, I had the key points in mind, relaxed my shoulders and enjoyed the ride despite sometimes 35 mph gusts. Grant Johnson’s segment on rain wasn’t lost on my either. On my return, I departed from I-90 for a bit and took the Old Vantage Highway to see the Wild Horses Wind Farm visitor center. After leaving the center I encountered fresh rain on pavement that had been dry (and hot) for the last several weeks. The white frothy water was a clear indicator that there was a lot of oil on the surface. And Jim, I need to look into better pants that don’t leak in the crotch area, or add in rain gear to my kit.

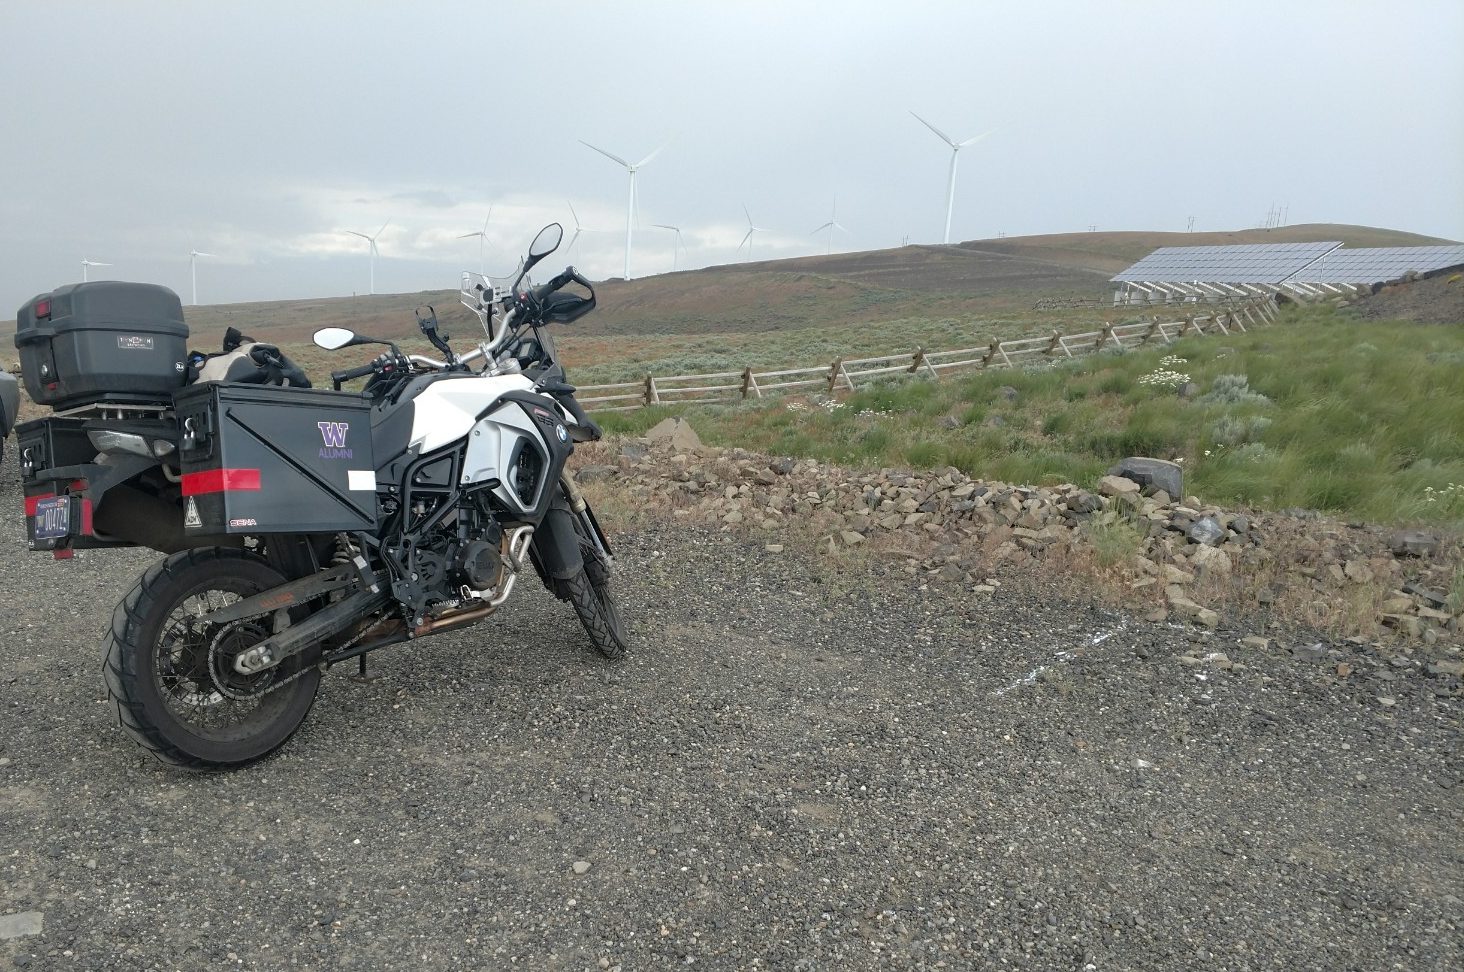
And Part 2 of the series? Wednesday on the ride East I hit a high of 95 deg F. On the ride home, at the wind farm visitor center, it was 42 deg F with blowing rain.

Categories
Tech

INNOVV Power Hub 1

IMG_20170115_074421871

A few posts ago I showed how I added auxiliary power to my F800.  I wasn’t completely satisfied with my relay and fuse block setup I  installed.  When I was searching on INNOVV’s C3 camera I found the Power Hub 1.  It consist of a control module and 5 inline fuses circuits to add your accessories.  Each fuse is rated for 5 amps, with a total of 40 amps for all circuits.  It is designed to be connected directly to the battery with both power and ground.  The power wire has an inline 40 amp fuse.  There is also a trigger wire and a ground output wire.  In this post I will show how  installed the Power Hub 1 on my 2015 BMW F800 GS Adventure.  There are several options for switching the unit on including the factory GPS connector.  Other options for switching are the tail light or the front park light.  

At $69, it is the best deal I have found.  It is pretty straight forward and easy to install and priced way below the other options on the market.  The case is sealed against the weather and has a simple LED light to indicate status.  The module switches on 10 seconds after power is applied to the switching wire.

IMG_20170115_085251797

The Power Hub 1 comes with everything you will need to install on most motorcycles, including crimp connectors, battery connectors, and a tap for the switching wire.  

IMG_20170115_084151175

I had already done some of the work when I installed my relay and fuse block.  Here is a picture of the GPS connector (the black plug at bottom), located on top of the battery. 

IMG_20170115_190341419

There are several options for locating the module. I decided to put it back in the tail of the bike.  I was able to really clean things up compared to how it looked before, removing most loose wires from under the seat.  All wire runs were wrapped in friction/cloth tape (thanks Alyxmoto for the advice) and routed closer to the frame and hidden under the trim.

So far I only have the USB 5v converter for the GPS, the automatic gate opener and higher amp factory style plug for powering the CyclePump Air Compressor.  

Categories
Uncategorized

F800GSA Side Stand Plate

I had some scrap steel and time so I decided to try my hand at building a side stand support plate for my 2015 BMW F800 GS Adventure.  The ones I have seen for sale are pretty simple.  Usually just two or three pieces, one having a spot to center the plate on the side stand, either machined or welded in.  I wasn’t sure how big it should be but I didn’t want it to get in the way while riding.

I started with some graph paper to sketch out the small plate on the stock side stand and added a the size of the plate.  I was going to use 3 pieces.  One for the bottom, one to fit around the bottom of the side stand and the third to act as a top clamp, holding it all together.  The center piece had the opening cut to match the stand.  The top one was just cut big enough to fit around the side stand at clear the welds of the stock plate.   I didn’t want to have to take apart the side stand, so the top piece is notched.  Below are three pictures of the finished product installed.  I painted the top and bottom plates black, and the middle one red, to match the bike.  The hardware is #10 stainless  flat socket head screws and nyloc nuts.

It is a little heavy but hasn’t caused any problems yet.  I have some 1/8 aluminum and may try and make another one.


Categories
Tech Vehicles

Adding electronics to the F800GSA

My 2015 BMW F800 GS Adventure came from the dealer with two power plugs.  One was the factory CAN Bus controlled power outlet on the tank panel, the other an SAE connector tied directly to the battery for charging.  The factory BMW socket is the Hella or Powerlet type socket common in Europe but not used much in the US.  It is only capable of 5 amps and will shut down if a larger draw is detected by the bikes computer.

I originally just wanted to add power for a GPS (Garmin GPSMAP 64).  I had picked up a USB adapter that plugged into the factory socket for charging the phone.  My phone takes the micro-USB plug.  I found a cheap adapter that was designed to be hardwired and has the mini-USB plug the GPS requires.  When adding accessory power, there are two basic options (no matter how you connect power, use circuit protection).  One is to just hook it up to the battery like the SAE charger plug.  The second is to use the vehicles switching capabilities to turn your accessories on and off with the bike.  The first way can lead to dead batteries if you forget to turn your device off and the bike sites for very long.

Fortunately, the BMW motorcycle comes factory ready for their GPS system.  It has a CAN bus controlled power connector tucked away near the battery.  Depending on the model bike, this plug can be found in various places.  The accompanying pigtail connector is available from several sources including the BMW dealer.

When researching how to connect the factory socket I read that some of the USB converters can keep the CAN bus switched on (I don’t really understand how) but I didn’t find a good list of ones that don’t.  I ended up with one that did.  I wired it directly to the pigtail, hooked it up and tested it.  It worked well, and even switched the GPS off after a minute (the factory accessory plug stays on for a minute after shutting off the bike).   By the next morning I had a dead battery.  Usually when I do a project like this I like the power to be switched through a relay to isolate the power but this time I rushed it.  

IMG_20160403_092752256_HDR

I decided to do it right and installed a relay to switch the power from the battery to the accessory.  I also added a 4 place fuse block at this time.  I used the factory GPS circuit to switch the relay.  All of this tucked (almost) neatly into the tail section behind and under the seat.  I fused the power coming from the battery with a fusible link.

IMG_20160403_092915728_HDR
Categories
Tech

20mm Ammo Can Panniers for F800GSA Factory Racks

I like to make stuff.  I’m also cheap (right, so that’s why I got a BMW motorcycle?)!  I’m going to step through how I made a set of mounts to attach 20 millimeter ammo cans to the factory pannier racks on a 2015 BMW F 800 GS Adventure.  I found my ammo cans from a local Craigslist seller.  If you are interested, search “large ammo can” on seattle.craigslist.com.  They were $30 each and located in Tumwater.  The cans are approx 8-3/8″ x 18-5/8″ x 14-7/16″ and weigh about 20 lbs each.  I figure this is about comparable to a 36 liter pannier.  He had a great inventory of all sorts of surplus ammo cans of various sizes.  I painted mine black on the outside and silver (to make it easier to find stuff) on the inside.

img_20160925_160309
img_20160919_185827464_hdr


My first step was make a sheet metal bender to make the 6 bends I needed.  I have a few other projects that I will be using it for.  I had a good sized chunk of 8″ channel iron. 

I made a few test bends in some scrap I had.  The “triangle” for the left side will be the trickiest.  I had a few small pieces of 16 ga steel and a few pieces of aluminum.  I liked how the aluminum bent and it’s weight, but I’m not able to weld it.

img_20160917_202627242_hdr
img_20160917_210359167_hdr
img_20160919_185534632_hdr

The most difficult part of the project was figuring out how the tabs that will engage the factory rack would be made and how the boxes would be locked to the rack frame. I took some pictures of the factory boxes on a bike at work.  

I decided to make the mounts out of 16 ga.  It will be heavier but a bit stronger than 18 ga.  I thought about getting a bead roller and trying to add some strength that way, but that would be another learning curve.  I started with the easier bends (the right side), before trying the left.  My bender was just small enough to be able to make the “triangle” on the left mount but I had to take the bender apart to get the steel back out.

img_20161120_143251266
img_20161120_143300736
img_20161120_160540074
img_20161120_161323491

I made the tabs by cutting a rectangle in half so that the angle would be close the angle of the ears on the rack.  I didn’t want to have to measure and guess each tab location so I took the rack frames off the bike and used them as jigs. This mostly worked.  I should have double checked fit a few more times while I was finishing the welds. 

img_20160925_153608846_hdr
img_20161120_182457609
img_20161120_182504582
img_20161120_182510036

The last thing to figure out was the method and location of the “locking” mechanism.  I really like the quick release design of the factory boxes.  The factory latch also works as the weak point if the boxes are hit hard, allowing the box to pop off with out bending the frame.  I ended up just making a clamp that attaches from the inside with a T-handle bolt.

img_20161123_133221957
img_20161123_133241291

After painting the mounts to match the boxes, I installed them to the boxes with 4 stainless steel #10 cap screws per box.  Since I will mainly be using these for around town and will likely switch to soft luggage for any long trips that see off-pavement I think the 4 screws will be enough.  In addition, there is the 1/4 stainless bolt holding them to the frame.

Here they are all mounted up.

img_20161123_212636349
img_20161123_212817717
img_20161123_212824603_hdr
img_20161123_213038903_hdr

I installed some of the DOT reflector tape that is used on commercial trucks and trailers.  This should help with visibility from the back.

img_20161123_reflector

Total cost was approximately $130:

  • $60 for both boxes;
  • $20 for metal, (I got a full sheet of 16 ga sheet metal for $80 but used less than a quarter of it);
  • $30 for various bolts and hardware, and;
  • $20 for 4 keyed alike locks.