Categories
Tech

80 Series CDL switch and “Pin 7 mod”

Ever wish you could manually lock or unlock the Center Differential in the transfer-case of an 80 Series Land Cruiser? It’s easy, with the addition of the factory CDL switch, available from your dealer or from Slee Off-Road. For the US market, the Center Differential will only lock if the transfer-case is shifted into low range. This also means your Center Differential will ALWAYS be locked in low range. If your Land Cruiser is equipped with Factory Electric Lockers, they will only engage with the Center Differential locked.

Please note that with the CDL engaged, the ABS light will come on and ABS function will be turned off. This is by design.

If you want to engage the CDL in high range, it’s as simple as adding the switch. The wiring connector is already in the dash, behind the left switch blank, next to the hazard switch. If equipped with factory alarm, this blank may be in use, but the wiring is still back there. Pull the center instrument panel trim after removing the 4 screws, insert the switch into the dash and plug in the connector.

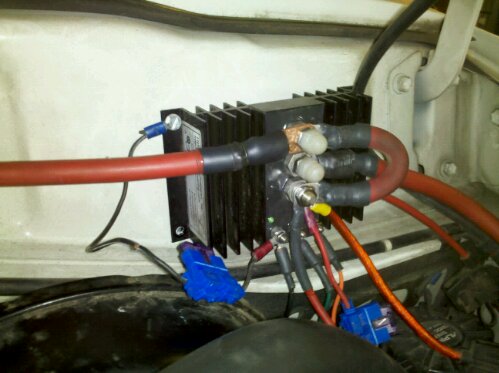
Now, if you want to be able to disengage the CDL while in low range, there are a few additional steps. This is what is called the “pin 7 mod”. It involves removing a wire from the CDL “transmission control relay” connector (located behind the silver ABS computer at the drivers side kick panel).

Disconnect the connector from the black relay box, locate the black with blue wire and carefully remove with a pick or terminal tool. Be sure to wrap this wire with electrical tape so it doesn’t ground out. Reinstall the connector and the ABS computer.

Categories
Tech

80 Series CDL 4 low switch

image

Are you having an issue locking your electric lockers or center differential?  One common culprit is the 4low switch on the top of the transfer case.

Often the problem can be easily fixed by using a thinner sealing washer.  Here I used a diff drain/fill plug washer (right).  It isn’t a solid washer, and crushes thinner than the original washer (left).

image

But first, make sure the switch functions properly by performing an ohm check while depressing the switch (requires removal of the switch).  The switch shouldn’t need to be pressed very far to close.  If your switch is bad, a new one can be found at your local Toyota dealer, part number 84222-12010.

Categories
Tech

FZJ80 Second battery tray.

image

To finish my dual battery installation in a 1995 FZJ80 I turned to CDan and crew at American Toyota in Albuquerque, NM. They had the tray and all hardware in-stock and ready to ship.

The tray is from a ’91-’92 FJ80, that has the 3FE motor, and needs to be trimmed slightly to fit against the fan shroud. The overflow bottle can stay where it is but the washer bottle needs to be relocated. One common place is between the firewall and the air cleaner housing, right next to the cruise control motor. Slee Offroad has a simple solution using two brackets. I plan on just making my own.

Categories
Tech

Prepping the FZJ80 For dual batteries.

image

In preparation for dual batteries and moving the radios over from the 60, I have installed the Hellroaring Technologies battery isolator/combiner.

The BIC95300B is connected to the main battery with 2awg wire through a 200amp AMG fuse. The power from the isolator to the second battery is also carries with 2awg wire, through another 200amp fuse, close to the second battery. Power for the accessories and radios is tapped off the second fuse, using 6awg wire, through a third, 100amp AMG fuse.

Next time I will detail the addition of the battery try and relocation of the washer bottle.

image
image
image
Categories
Tech

Expedition One FJ Cruiser Bumper

image

Had the opportunity to install an Expedition One bumper on a 2010 FJ Cruiser.  What a well built bumper, very complete and easy to install.  Customer chose to fit the bumper with a Superwinch 9k winch spooled with synthetic line and a roller fairlead.