Categories
Tech

Toyota FJ60 Land Cruiser Seat Upgrade

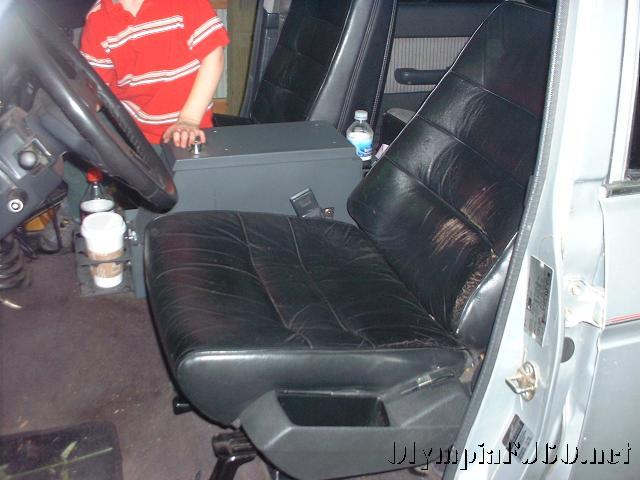
I have been less impressed with the seats in my ’87 FJ60 since I bought it. They are thinly padded with a weak frame (for someone of my size). I installed seats from a Volvo 240 wagon a few years ago and this was a huge improvement. Better padding, solid frame, just not that adjustable. I regularly pursue the local wrecking yards in search of a better seat that will fit. I have looked at other Toyota seats, BMW, mini-van and others as well. I have never found seats that I thought would both fit, and meet my needs. During a visit to my neighbor hood wrecking yard last summer I came across a Mercedes M350 that had been badly wrecked. They looked like they would fit and both the drivers seat and the passenger had 8 way adjustable power as well as seat heaters.

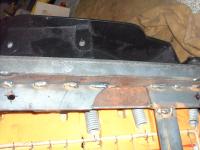
I never did a write up of the Volvo seats but I will include a few pictures before continuing onto the Mercedes seats.

custom-volvo-seats-004

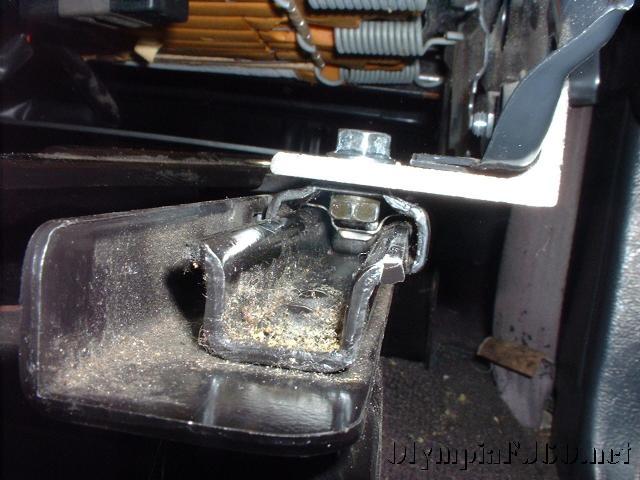
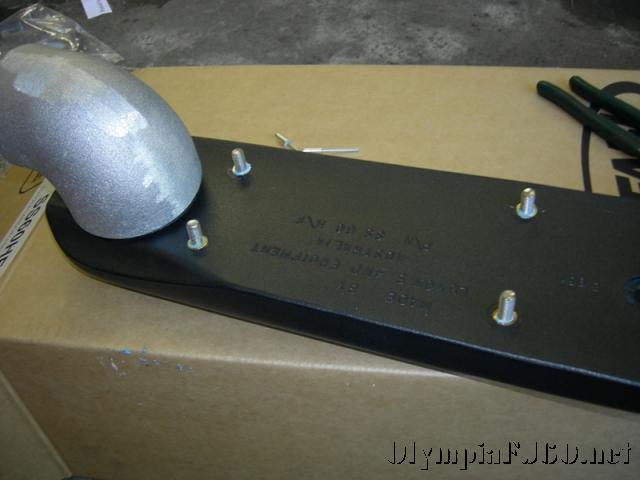
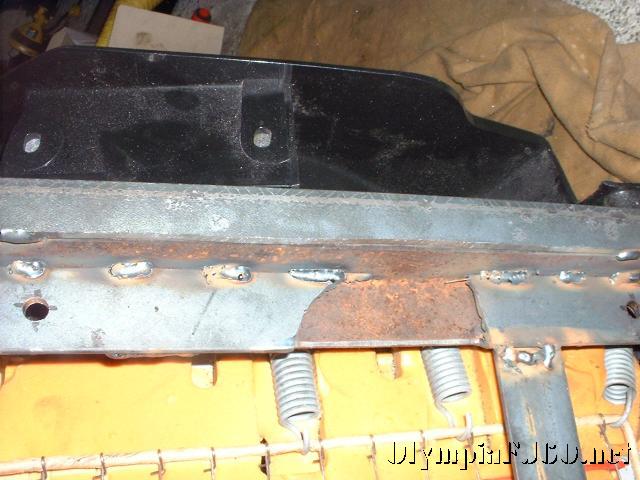
The factory slider was removed and a bracket was made to fit the Toyota slider to the seats.

custom-volvo-seats-001
custom-volvo-seats-003
custom-volvo-seats-005
custom-volvo-seats-006
custom-volvo-seats-009

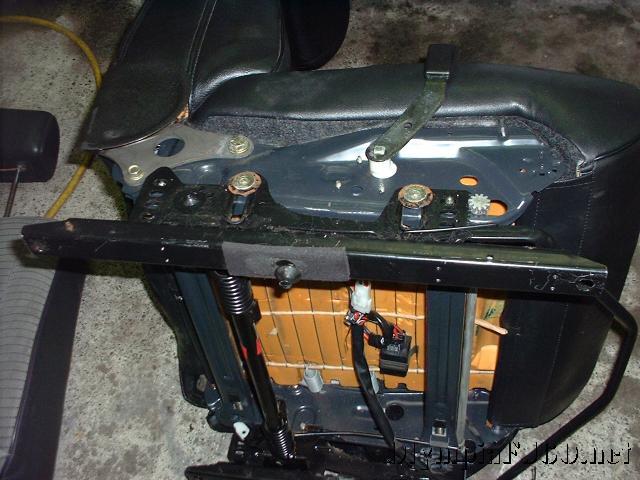
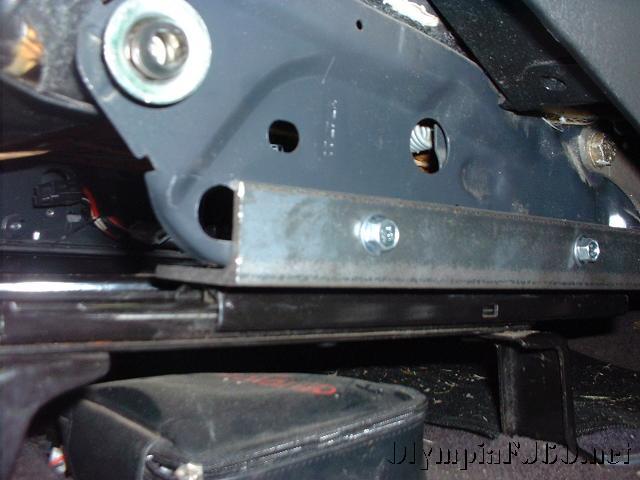
I am 6’6″ and the first bracket made the seat sit too high. This left my head in the headliner with the seat back at a comfortable position. I figured I could lower the seat another 1.5″ and modified the drivers bracket to fit this.

custom-volvo-seats-013
custom-volvo-seats-014

custom-volvo-seats-017

This bracket was pretty tight to the slide and it was difficult to adjust when slid all the way back.

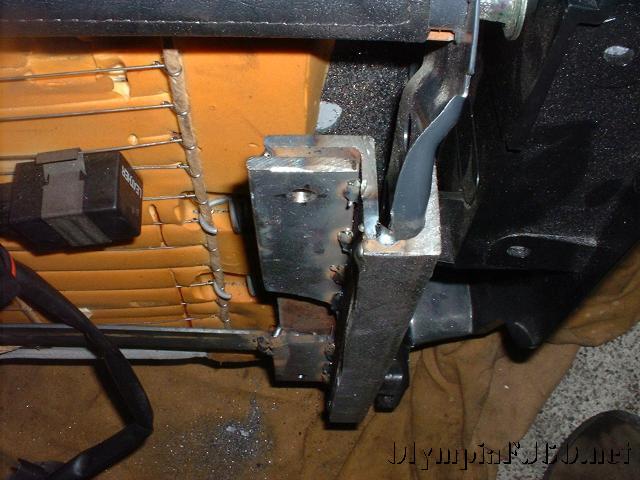
Now for the Mercedes seats. This was a much easier bracket to make. Instead of welding angle, all I had to do was bend up some 2″x.25″ bar stock purchased from Lowe’s. To bend the bar I used a little bender from Harbor Freight. This was the max size the bender could handle but it was adequate.

I drew up a sketch in Google Sketchup with measurements from the truck floor. Now, the floor pan on the ’86 and ’87 trucks is different than the earlier trucks. The earlier trucks have a higher raised spot that the sliders attach to. This may be enough that these seats would not fit for tall people.

Once I had my brackets I drill the floor mounting holes and loosely bolted them to the floor. I then set the drivers seat in the truck to get an idea of location. Once selected, I marked the brackets for drilling the seat mounting holes. Brackets bolted to the seats it was time for test fit. I got lucky on this one and the seats fit. They still sit a little high in the back and I have to have the rear adjusted all the way down with the front all the way up. I have room to lower the back of the bracket about 2″. I will add photos to this article once I have reworked the brackets.

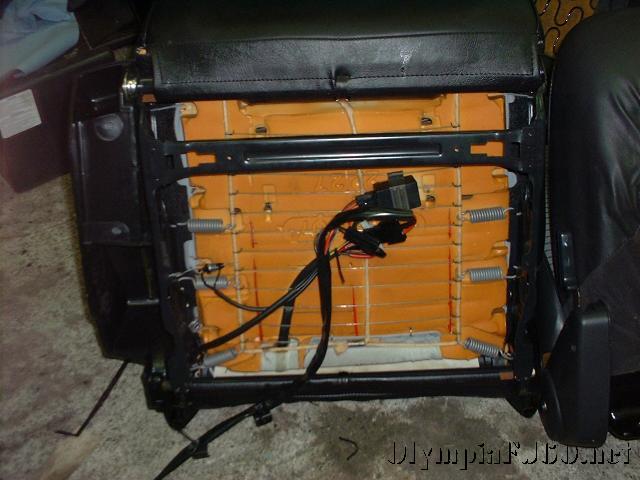
Now for the wiring. There are two types of seats in the ML350, power with memory and just power. I ended up with the power with memory. The power only may have been a little easier to wire but this is what I had. On the power with memory seats, each seat has a power seat module (PSM). This is a little relay/computer box that is attached to the bottom of the seats. All of the motors and motor sensor connect to this box as well as input from the vehicles extended activity module (EAM). My seats came with the PSMs (be sure to get the harness from the car to the PSM). The EAM performers many functions in the car none of which are needed here except power to the PSM.

It was a little confusing at first but I figured out the wiring. There is two power inputs to the PSM, 12v+ 30amp to the seat functions and 12v+ 20amp for the seat heaters. There is also a ground wire, and two wires to the heated seat switch. There are two positions for the seat heaters, regular and rapid heat (hi). This again had me confused for a while as I kept trying to apply 12V+ to the wires with no action from the relays. After looking at the wiring for a 4th or 5th time, going to the computer to do some additional research, it dawned on me that the heater relays may be controlled with 12v-. After a few tests I had completely functioning power heated seats.

Is it worth it? I think both the Volvo seats and the Mercedes seats are a great improvement. Not only do they look good (leather), but the are more comfortable and have a much more rigid frame. I think with the ease that the Mercedes brackets were made and how nicely they fit in the 60, the would be my preference every time. They may be much harder to find though.

Categories
Tech

H55F into an Early FJ60 Land Cruiser

I recently installed an H55F Transmission into a 10/84 built ’85 FJ60. It is commonly known that the H55F is a direct installation, and upgrade, into a 5/85 and later FJ60. There are several writeups detailing the later installation. I had always heard that the earlier trucks were much more difficult but thought I would give it a try.

The H55F offers a few benefits over the stock H42 4 speed transmission found in the US market. It has a overdrive 5th gear. In our over 55 freeway speeds this can be a blessing, it reduces the RPMs and noise. It also offers a lower 1st gear. If you do much offroad, this can be a big help in 4 low.

4-5speed

At first glance, the H55F looks the same as the early H42. The most noticeable difference is the extension housing making it 3 1/2 inches longer. This is were the the fifth gear is located. It also has the transfercase shifter mounting moved back a little and out.

If you haven’t rebuilt the transfercase this is an excellent time. You will need to replace the case gaskets regardless and most of the labor to rebuild it will be done. The only other parts to the rebuild is to replace the bearings.

tcase_shifters
5_speed_bolts

The major difference between the early and late swaps are the few extra parts and modifications you will need. The drive shaft lengths will need to change (the front lengthened and the rear shortened by about 3.5″). Also you will need to modify the transfercase shifter or get the shifter from the later H42. I did not feel comfortable cutting and welding the cast lever and so I turned to SOR for the lever parts. You will also need the longer transfercase to transmission bolts from the later transfercase. While it is possible to use the 4speed shifter lever, the 5speed lever is a better fit and does not require modification to miss the dash.

First step is to remove the drive shafts, cross member, and disconnect the speedometer cable, ground wire and wiring harness. Using a suitable transmission jack, remove the transmission and transfercase as one piece. Carefully disassemble the transfercase per the factory service manual. Make sure to note the order of the various parts such as the speedometer gear and spacers.

center_bolt_hole
oiler_cup

Before you start to assemble the transfercase to the new H55f take note of a few things. First, on the later transfercase, you will need to plug the center bolt hole on the forward case half, using a 1/4 pipe thread tap and plug. The early case does not have this hole. The 5th gear oiler cup will also need to be installed. Unlike the other gears in the transmission and transfercase, the 5th gear is not splash oiled. Without this cup, you may quickly burn up your 5th gear.

Install a new input shaft seal in the front case half, then install a new gasket between the transmission and transfercase. This is were you need the longer bolts from the later transfercase. It is important to use a liquid sealer on the bolts that secure the front case half to the transmission. Before putting the input gear onto the input shaft, install the idler gears on the idler shaft. Continue assembly as normal.

5_speed_install_23

Once the transfercase is mounted on the transmission, the complete unit can be reinstalled into the truck. The rear mount and cross member will bolt up just as it did with the H42. Now install the longer set of transfercase shifters. Make sure you get the the shifter guide when you order your shifter parts. Now is when you want to take the measurements for the front and rear drivelines. It should be a 3 1/2 inch change from the current lengths, but be sure and measure. Make sure to check with the shop doing the work to see what they want you to measure. Most of the time it will be flange to flange. It is best to measure with the vehicle on the ground. A 1 inch collapse should be plenty (this is how much shaft can travel to full compression). Also make sure the shaft is in phase before installing in the truck.

front_shaft_clearance

I was concerned with the clearance of the front driveline and the transmission crossmember, but with the double cardon joint on the earlier trucks it has no problem. Here are a few pictures to compare the difference between and H55F in an early FJ60 and a late FJ60.

The transfercase boot may need a little trimming to fit around the new shifter. It may be difficult to get the 5speed into gear at first.  Here is a summary of some of the possibilites (cruiserparts.net is another source for the 5speed and shifter parts).

Categories
Blue Highways Tech

Installing a Safari Snorkel on an ’87 FJ60

I recently installed a Safari Snorkel on my 1987 FJ60 Land Cruiser. The snorkel can be found and East Olympia Cruisers. If you are a TLCA member, be sure to mention it to get 10% off.

It was a straight forward installation easily following the supplied instructions. This kit is designed in Australia and fits all 60 series Land Cruisers including the 2H and 12HT diesels as well as the 3FE powered FJ62. Slight modification of the instructions is required for the 2F powered FJ 60. I was fortunate to have installed an air clean assembly combined from an FJ62 and BJ60 for my EFI conversion.

The only tools required are a few standard sockets, a step drill (or a variety of drill bit sizes) and a 95mm hole saw or body saw (a jigsaw would work as well). What follows are the instructions included with the snorkel kit with metric to fractional conversions provided by me.

  1. safari_snorkel_fj60_16 Remove the windscreen washer bottle and the battery from the vehicle. The air cleaner entry duct will need to be removed from the inner guard area. ( I was able to complete the installation without removing the battery but it would have been easier).
  2. safari_snorkel_fj60_02Tape the template in position on the upper rear corner of the guard (fender). Using a felt pen, mark the whole positions then remove the template.
  3. safari_snorkel_fj60_06Drill a 4mm (5/32) pilot hole for each of the holes. Open the 4 mounting holes to 16mm (5/8) using a step-drill. The front hole should be cut to 95mm (3-3/4) using a hole saw. The drill should be held horizontal while cutting the hole. When drilling/cutting is completed, deburr the holes to leave a smooth edge. (This is where I used an air powered body-saw instead).
  4. safari_snorkel_fj60_04Rivet the elbow casting to the snorkel snout. The snout of the casting should face towards the front of the snorkel. Keep the casting as close to the outer end of the snorkel snout as possible. This will make fitment easier. Seal this joint thoroughly with silicone. (I put silicone on the “snout” prior to installing the casting. This insured a good seal as well as making it easier to slide the casting all the way on).
  5. safari_snorkel_fj60_09Screw the stainless steel studs into the inserts in the back of the snorkel. Bolt the upper mounting bracket to the snorkel using 2, 6mm bolts and washers. Sit the snorkel in position on the vehicle and mark the upper mounting holes on the “A” pillar. Remove the snorkel. Drill the upper holes to 8mm (5/16).
  6. safari_snorkel_fj60_10Paint the holes to prevent rust. Insert the plastic body clips in the upper holes. Remove the upper bracket from the snorkel body and fasten it to the “A” pillar.
  7. Slide the flexible ducting onto the alloy elbow. Fasten with 60/80 (70/90 provided with kit) clamp (the clamp adjuster should be orientated towards the outside of the elbow casting to allow for easier fitment).
  8. safari_snorkel_fj60_18Place a ring of rubber edging around the inner guard hole nearest the air cleaner snout.
  9. Slide the cuffed hose through the outer hole and along the inner guard cavity (fender well). Thread the casting through the hole and secure the snorkel in position on the vehicle using appropriate hardware (nuts and fender washers).
  10. Thread the ducting through the inner guard hole and onto the air cleaner snout. Secure using a 60/80 (again, 70/90 provided with kit) hose clamp.
  11. Refit the windscreen washer bottle and battery. Place the air ram on top of the snorkel and secure with the clamp provided (the black one).
safari_snorkel_fj60_11

That’s it, not much too it if you don’t mind drilling and cutting on a perfectly good fender. It takes about 1 1/2 hours to complete if you don’t have to run around looking for a hole saw.
I don’t expect to be crossing deep enough water to need it, but I do travel really dusty roads and end up with a bunch of silt in the air cleaner box from sucking air out of the fender well, so much actually that I will not use a K&N filter. I had a K&N on for a while but ended up with some fine dust getting through. I am hoping this will keep the filter housing a little more dust and grit free.

Categories
Tech

Wagongear tailgate storage lid

Tailgate lid installed

I just finished the quick and easy installation of the 60 series tailgate storage lid from Wagongear.com, into my ’87 FJ60 More information can be found at the original forum thread on Ih8mud.com. This cronicalls Kevin’s original design to final product as well as installations by many satisfied customers. It is amazing how much space is really hiding in there.

In the case of my installation it even straitened my concave tailgate. I have an air powered body saw (a little smaller blade than jig saw) that easily cut the center out. I had purchased it at Harbor Freight years ago. Had it all installed in about 40 minutes. I was amazed how badly bent my tailgate was in the center. It closes a lot better now and the upper gate closes a little tighter to the body. Kevin has attempted to make this lid fit all 60 series tailgates, but the hole spacing differs slightly between different years. I only had to enlarge the four corner holes (on the tailgate not the lid). It comes with stainless steel button head Allen screws, washers and locking nuts for a clean finish. I just have to replace a few bolts on the box I have in the back and shim it up 1/4″ or so to keep it from rubbing on the lid.

Space gained

Great work Kevin.

Categories
Tech

2F TBI – Links Page

These are the links to resources I used when I did my 2FTBI conversion on my 1987 FJ60. I will be posting an update to include things I changed on the TBI setup since I originally installed it.

How to pages

How To Build a GM EFI System – get a detailed ebook manual to insure success with your conversion.

www.diy-efi.org GM ECM tech info

Tom Quinn’s 2F FI Install

Suppliers

The Moates.Net Web Site

CUSTOMEFIS.COM

Painless Wiring installation manual

Turbo City sells Performance Directly to You

White Racing Marine

Affordable Fuel Injection

Centech Online Wiring and Automotive Accessories

Fuel Injection Wiring Harnesses

Howell Engine Developments, Inc. Home Page

Stealth Conversions Price List

MegaSquirt – Electronic Fuel Injection Computer by Bowling & Grippo

OBD-2 Vehicle Explorer Scan Tool Browser

Painless Wiring Installation Manual Home Page

Tuning Links

Thirdgen.org – How to info

WinALDL – the Windows 160 Baud ALDL Reader!

TunerCat – bin editor


Common GM part numbers


Throttle Body Injection 60101 & 60201
Main Computer 1227747 or 16121154
Brake Switch 25524845
Neutral Safety Switch 15705308
Manifold Absolute Pressure Sensor 16137039
Electronic Spark Control Module 16128261
Fuel Pump Relay(Style 1) 14078915 or 212-307
Fuel Pump Relay(Style 2) 14089936
Coolant Temperature Sensor 25036979
Knock Sensor 10456018
Oxygen Sensor AFS 21
Oil Pressure Switch 25036553 or D1818
Vehicle Speed Sensor PPP 60115
Distributor to Coil Wiring 12039177
Coil Power/Tach Pigtail 12101896
EGR Solenoid 1997111 or 214-331
Prom 16139566
Cal-pack 16060836