Categories
Tech Vehicles

Adding electronics to the F800GSA

My 2015 BMW F800 GS Adventure came from the dealer with two power plugs.  One was the factory CAN Bus controlled power outlet on the tank panel, the other an SAE connector tied directly to the battery for charging.  The factory BMW socket is the Hella or Powerlet type socket common in Europe but not used much in the US.  It is only capable of 5 amps and will shut down if a larger draw is detected by the bikes computer.

I originally just wanted to add power for a GPS (Garmin GPSMAP 64).  I had picked up a USB adapter that plugged into the factory socket for charging the phone.  My phone takes the micro-USB plug.  I found a cheap adapter that was designed to be hardwired and has the mini-USB plug the GPS requires.  When adding accessory power, there are two basic options (no matter how you connect power, use circuit protection).  One is to just hook it up to the battery like the SAE charger plug.  The second is to use the vehicles switching capabilities to turn your accessories on and off with the bike.  The first way can lead to dead batteries if you forget to turn your device off and the bike sites for very long.

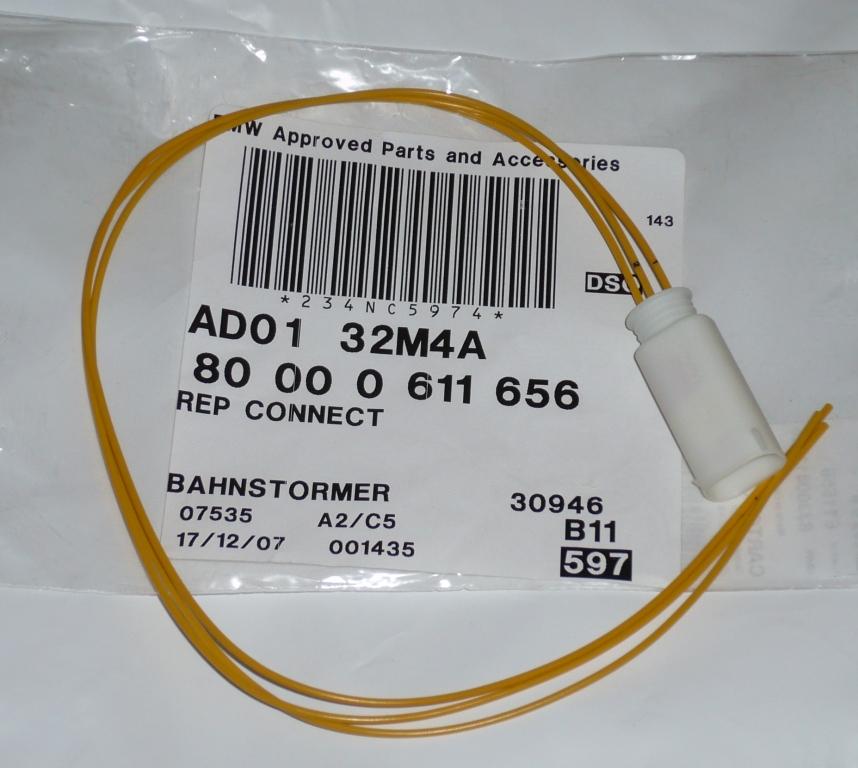
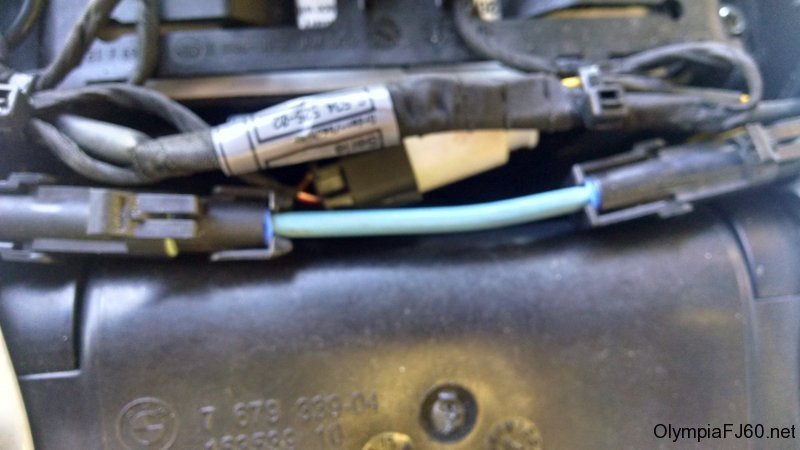
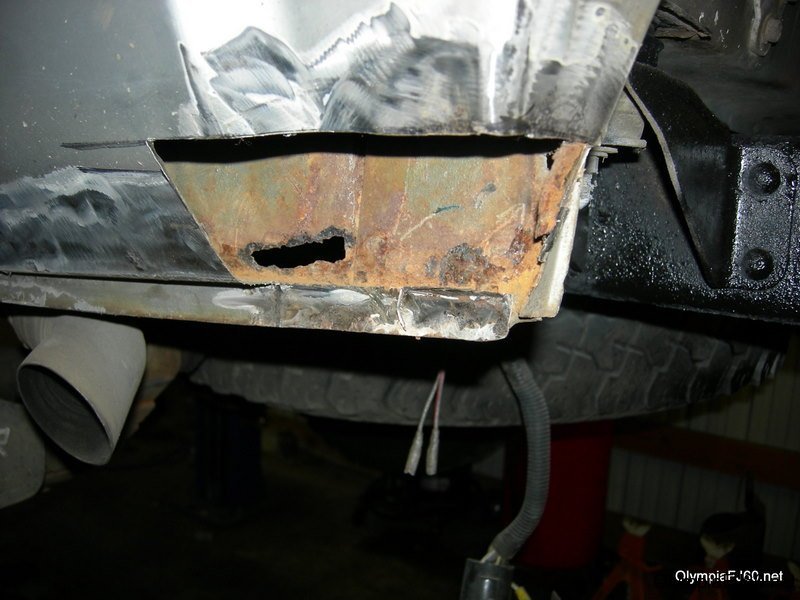
Fortunately, the BMW motorcycle comes factory ready for their GPS system.  It has a CAN bus controlled power connector tucked away near the battery.  Depending on the model bike, this plug can be found in various places.  The accompanying pigtail connector is available from several sources including the BMW dealer.

When researching how to connect the factory socket I read that some of the USB converters can keep the CAN bus switched on (I don’t really understand how) but I didn’t find a good list of ones that don’t.  I ended up with one that did.  I wired it directly to the pigtail, hooked it up and tested it.  It worked well, and even switched the GPS off after a minute (the factory accessory plug stays on for a minute after shutting off the bike).   By the next morning I had a dead battery.  Usually when I do a project like this I like the power to be switched through a relay to isolate the power but this time I rushed it.  

IMG_20160403_092752256_HDR

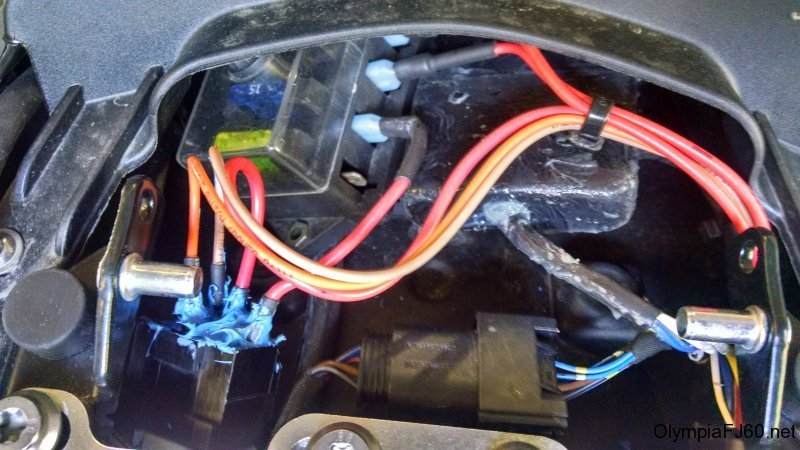
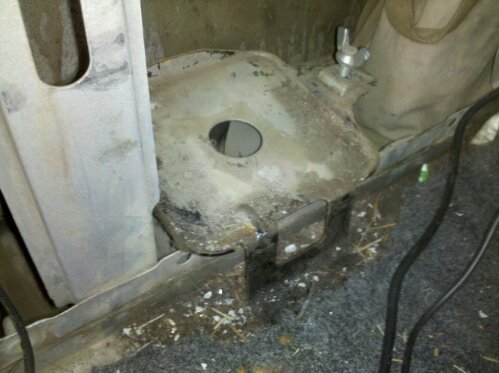
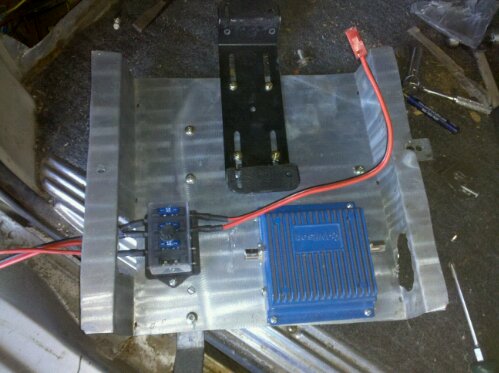
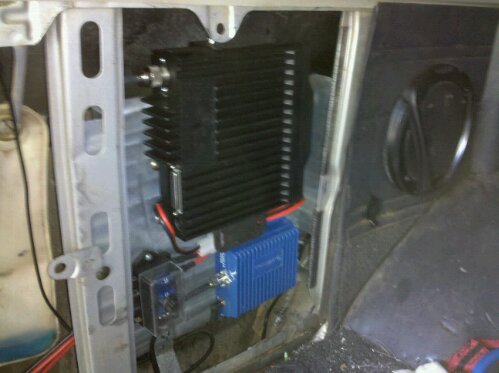
I decided to do it right and installed a relay to switch the power from the battery to the accessory.  I also added a 4 place fuse block at this time.  I used the factory GPS circuit to switch the relay.  All of this tucked (almost) neatly into the tail section behind and under the seat.  I fused the power coming from the battery with a fusible link.

IMG_20160403_092915728_HDR
Categories
Tech Vehicles

FJ 60 Rust Repair

dscn4215

I have been watching a few patches of rust grow on the Land Cruiser for several years. I was washing the truck a few weeks ago, it’s after winter wash. While washing the left rear quarter I noticed a big patch in the very corner blast off. It was a hole about 1″ by 3″ long. I was just finishing loading up the remains of an old FJ60 I parted/scrapped. For as much rust as it had, I was presently surprised to find the very corner I needed was intact.

dscn4214

I cut out the bad area and used it as a template to cut out the patch. Evidently I didn’t do to well measuring as I had to cut a little extra and double patch. After getting the patch about right, I tacked it in place, then went around, ever inch or so at a time to keep it from getting too hot, and filled in the missed spots. After that, I ground it down, filled with some “Liquid Metal” sanded and painted.

It took a while, but wasn’t too bad for a first try. Hopefully it will last for a while.

Categories
Overland travel Tech Vehicles

Communications Upgrades

In my Land Cruiser I use a CB radio and Cell phone for most on road and trail communications. Around camp and hiking I use a FRS/GMRS radio. I decided to make a few upgrades in the Land Cruiser to make communication easier and more reliable.

For the cell phone, I have added a Wilson Electronics 3 watt booster and external antenna. At the time they didn’t have the cradle, but my old Motorola phone had an antenna port in the back. Now, they have a complete kit with external antenna, booster, wiring and universal cradle. The cradle has the inside antenna and will work with any phone, regardless of antenna port. I am using mine with the Motorola Droid. While just an external antenna can increase cell phone reception markedly, the 3 watt booster really gets your signal back out to the tower. Even when I don’t have enough signal for voice communication, I can usually send and receive text messages.

I originally had the booster just sitting under the drivers seat, an extension for the outside antenna, and the cell phone plug. I have been using the cradle for a while and love it. I’m doing some other comms work (keep reading), so I have decided to relocate the booster the the rear quarter panel. The power connector is just long enough, I moved the extension cable from the outside antenna, to the inside antenna/cradle.

One other modification I made to the cradle was to add a small magnet to correspond with the Droids sensor, making it my in car navigation as well as communications device. I will write more on this in another article.

For the GMRS radio, I went to GMRSOutlet.com were I found the Icom F2821 on clearance price. This radio is capable of GMRS, Business and

70cm communication. I had it programmed for GMRS, but also got the programming cable and software. It supports both CTCSS and DTCS tones for privacy communications. Remember, CTCSS and DTCS don’t keep others from hearing your conversations, just keeps them from interrupting you.

Because of mounting space, I decided to get the separation kit to mount the radio next to the phone booster in the rear quarter panel. With a removable face, the controls can be mounted in front. The only problem with mounting the main radio unit in the back, is the power demands. It needs direct battery connection, or at least a 10 gauge wire with 20amp protection.

I also wanted to add a power point for an ARB Fridge. so I decided to run some big power to the back. I already have dual batteries, so getting enough power won’t be a problem. I am running some 6 gauge wire to the back. I already have a 12 gauge wire running for trailer power and auxiliary backup lights, but that’s not enough power. I installed an extra fuse block in the back. Both the positive and negative line to the radio needs a 20 amp fuse. The fridge is on a separate circuit, and the trailer charge wire will be moved to run from the last fuse on the block.

image

For the radio mounts I decided to remove the factory jack and tool kit. With my lift, the jack doesn’t do much, but I’m going to find a place to put it anyway. The mount for the jack is bolted in on the inner fender and floor of the truck. The Tool bag mount was tack welded to one of the supports. For holding the radios and fuse block, I bent a piece of stainless sheet I had left over from my Off Road Trailer kitchen. I also had some 1″x1/16″ bar for extra support. One bar was bent up to bolt into the lower jack mounting holes, the other runs horizontally from one inner fender support to the other.

image
Radio Mount before installation
image
Radio Mount Installed with Radios
Categories
Outdoors Tech Vehicles

Camp Bug I gets a few new accessories

Getting ready for a few camping trips I decided to update a several items on the trailer.

The first was to install a door for a little more storage space and so I can check on the batter charge condition without having to open the top and remove the inside shelf.  I was able to find the correct size hatch on Ebay for a reasonable price.

trailer updates 1
trailer updates 2

I also installed an outdoor shower box for rinsing off and the occasional shower. I also have a shower enclosure and use the solar shower bag. I like using the bag because it prevents any one from over using the water. The shower will be plumbed into the lines going to the sink in the rear.

trailer updates 4
trailer updates 5

I also wanted to add propane bottle bracket. I kept looking (as others have) for the correct solution for my trailer. I was going to use the XL Quick Fists as they have and extremely high rating, but I decided I wanted the primary tank on the tongue rather than against the box. I ended up bending some 2″x 3/16″ strap on my harbor freight bender. Making 90* bends is about all I use it for and it does the job well. I made a 1/4 cage crossed with a full cage that is hinged on the top and uses a heavy locking clasp. It is bolted to the tongue.

trailer updates 6
trailer updates 3

For the spare tank I used the XL quick fist straps. They are just big enough for the smaller tanks and hold it quite well.

Photo_080409_sm_003

The last thing I did before the trip is the installation of the under body water tank and gray water tank. This opened up considerable storage space and lower the COG even more, as well as move the water weight centered over the axle.

The water tank is just a basic unbaffled 20 gallon tank. All fittings are customizable. I just put a vent, drain and fill fitting.

water tanks 03.

The tank was fitted up for marking holes then temporarily strapped up with plastic plumbers tape.

water tanks 05
water tanks 06

For the waste tank I decided to use a standard RV drain valve. Time will tell if this was a good idea. It sits pretty tight up to the frame behind the spring shackle. This tank came pre-molded with a 3″ drain and is tapered at the back, just enough to tuck up to the rear frame member. I had a 1 1/4″ fill and 3/4 vent fitting added. I got a 3″-1 1/2″ adapter and the valve at the local RV repair store and the ABS fittings at the hardware store.

water tanks 02
water tanks 08
water tanks 09

For the tank straps I used some 1/8 x 1.5 bar, added some bends for soft corners and bolted it up to the frame using the same Rivnuts I used in the decking. This is how my Land cruiser gas tank is mount so I think it will be adequate for the trailer.

There is just about the same amount of room between the bump stops and the springs as there is between the axle tube and the tank. I may add a little aluminum skid shield to protect the hoses and fittings. This would be attached to the tank straps.

Here are a few pictures of  the tank straps. Turned out pretty well. No sign of failure yet but the center of the water tank may need a little more support.

Photo_080409_sm_007
Photo_080409_sm_006

I was able to gain a lot of space in the trailer by moving the water tank underneath. I rearranged the batteries to help maximize this space.

Photo_080409_sm_001
Photo_080409_sm_002
Photo_080409_sm_004

Here are a few of the trailer in action on a recent camping trip to the Naches Ranger district.

Naches 2009 sm 04
Naches 2009 sm 03
Naches 2009 sm 06
Categories
Vehicles What's going on

300,000 miles

Well, it has happened. At 8:44 pm PDT January 3, 2008 my 1987 Toyota Land Cruiser turned 300,000 miles. While this isn’t the highest mileage vehicle out there, it is my first one to reach such a distance.

As irony would have it. It tripped the mark crossing the same bridge that we were on about 5 months ago when a heater hose split stranding us on our late night trip to Yakima. That was the second time in the trucks history with us that we had to have it towed. After an hour of trying to fix it, replacing the hose and refilling the coolant, the engine would not restart and I was forced to calla wrecker.


View Larger Map
We crossed the Mayfield Lake bridge on Hwy 12 and stopped on the other side for a few pictures (just to show that I’m a real cruiser geek). Thankfully my wife tolerates this madness.

This is the closest intersection. The odometer was at 300,000.6.

My wife and son tolerating me as I stand in the middle of Hwy 12.