With the introduction of the new ARB Freezer Fridge that utilizes a highly sophisticated power supply with low voltage cut-off and fault code diagnostic system we’ve found these units are very sensitive to poor performing power sockets and the associated circuits of the vehicles they are used in. Typically the problem plugs are at the rear of a vehicle and the problem is low voltage at the socket. The result is a fridge that reads an incorrect dead battery and shuts off flashing a low voltage code.
………………………..
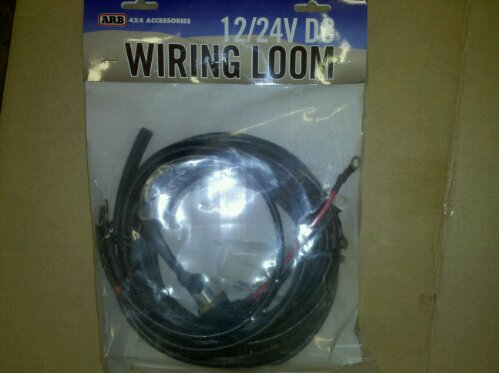
The Fix: ARB now offers a kit with 18 feet of appropriately sized wire, needed terminals, fuse, and female socket to wire a full time permanently hot fridge plug into the vehicle. This is a cost effective solution to add the needed power capacity for the fridge and gain an additional outlet in the rear cargo area of the truck ensuring the fridge functions as it was designed.
Full ARB article available here [download id=”4″] in pdf
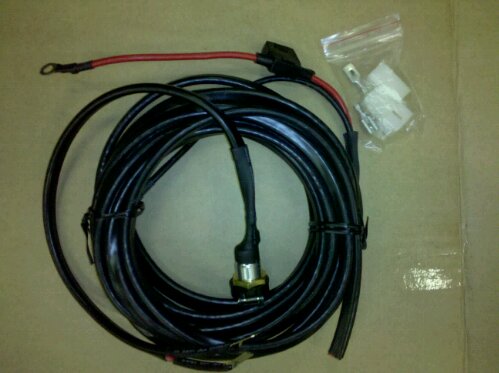
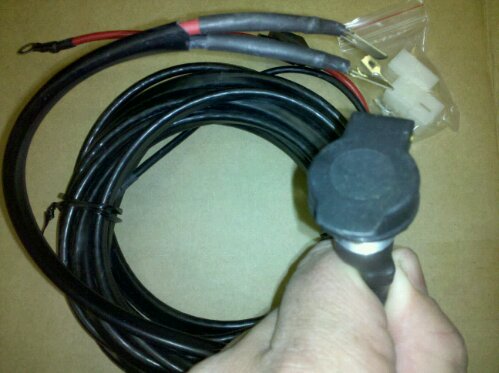
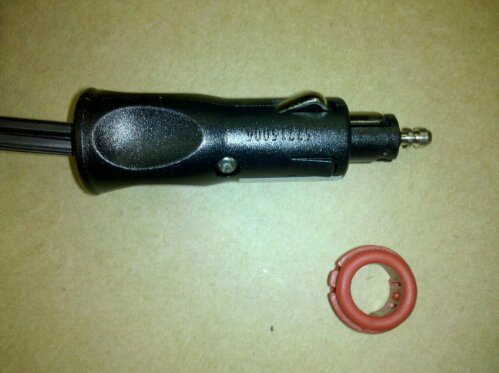
So I ordered one, even though I had just added a plug during my Communications Upgrades. I wanted to get the Hella style positive locking plug. It comes with every thing you need to easily connect the fridge directly to your battery. There is the plug, with a short pig tail and connectors. There is 18 feet of 2-10 primary wire with with an inline fuse and crimp connector and housing to connect to the socket pig tail.
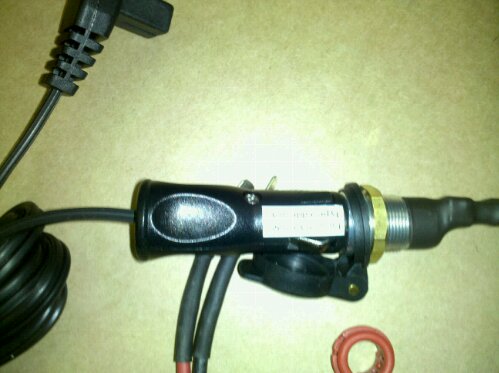
You will find the socket smaller then the average 12v accessory outlet, but it is very solid sealed metal bulk head type socket. It also has a spring loaded cover.
Since I already have a 6awg primary wire running from my battery to the back of the vehicle, I didn’t need the supplied wiring or fuse, but I have not been able to find the socket any other place. I mounted the socket right next to my 12v accessory socket and wired into my auxiliary fuse block in the rear quarter panel.
In my Land Cruiser I use a CB radio and Cell phone for most on road and trail communications. Around camp and hiking I use a FRS/GMRS radio. I decided to make a few upgrades in the Land Cruiser to make communication easier and more reliable.
For the cell phone, I have added a Wilson Electronics 3 watt booster and external antenna. At the time they didn’t have the cradle, but my old Motorola phone had an antenna port in the back. Now, they have a complete kit with external antenna, booster, wiring and universal cradle. The cradle has the inside antenna and will work with any phone, regardless of antenna port. I am using mine with the Motorola Droid. While just an external antenna can increase cell phone reception markedly, the 3 watt booster really gets your signal back out to the tower. Even when I don’t have enough signal for voice communication, I can usually send and receive text messages.
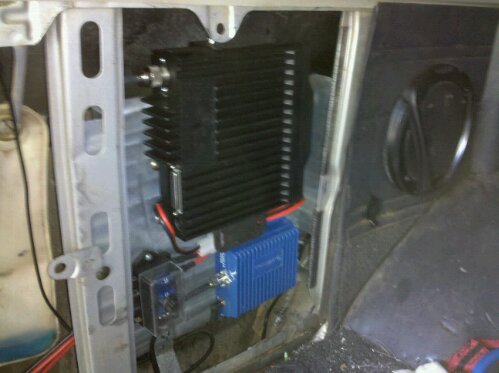
I originally had the booster just sitting under the drivers seat, an extension for the outside antenna, and the cell phone plug. I have been using the cradle for a while and love it. I’m doing some other comms work (keep reading), so I have decided to relocate the booster the the rear quarter panel. The power connector is just long enough, I moved the extension cable from the outside antenna, to the inside antenna/cradle.
One other modification I made to the cradle was to add a small magnet to correspond with the Droids sensor, making it my in car navigation as well as communications device. I will write more on this in another article.
For the GMRS radio, I went to GMRSOutlet.com were I found the Icom F2821 on clearance price. This radio is capable of GMRS, Business and
70cm communication. I had it programmed for GMRS, but also got the programming cable and software. It supports both CTCSS and DTCS tones for privacy communications. Remember, CTCSS and DTCS don’t keep others from hearing your conversations, just keeps them from interrupting you.
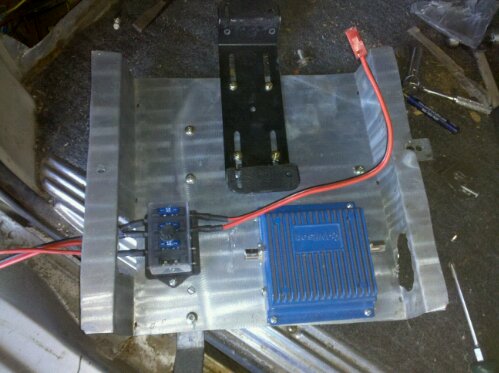
Because of mounting space, I decided to get the separation kit to mount the radio next to the phone booster in the rear quarter panel. With a removable face, the controls can be mounted in front. The only problem with mounting the main radio unit in the back, is the power demands. It needs direct battery connection, or at least a 10 gauge wire with 20amp protection.
I also wanted to add a power point for an ARB Fridge. so I decided to run some big power to the back. I already have dual batteries, so getting enough power won’t be a problem. I am running some 6 gauge wire to the back. I already have a 12 gauge wire running for trailer power and auxiliary backup lights, but that’s not enough power. I installed an extra fuse block in the back. Both the positive and negative line to the radio needs a 20 amp fuse. The fridge is on a separate circuit, and the trailer charge wire will be moved to run from the last fuse on the block.
For the radio mounts I decided to remove the factory jack and tool kit. With my lift, the jack doesn’t do much, but I’m going to find a place to put it anyway. The mount for the jack is bolted in on the inner fender and floor of the truck. The Tool bag mount was tack welded to one of the supports. For holding the radios and fuse block, I bent a piece of stainless sheet I had left over from my Off Road Trailer kitchen. I also had some 1″x1/16″ bar for extra support. One bar was bent up to bolt into the lower jack mounting holes, the other runs horizontally from one inner fender support to the other.
Radio Mount before installationRadio Mount Installed with Radios
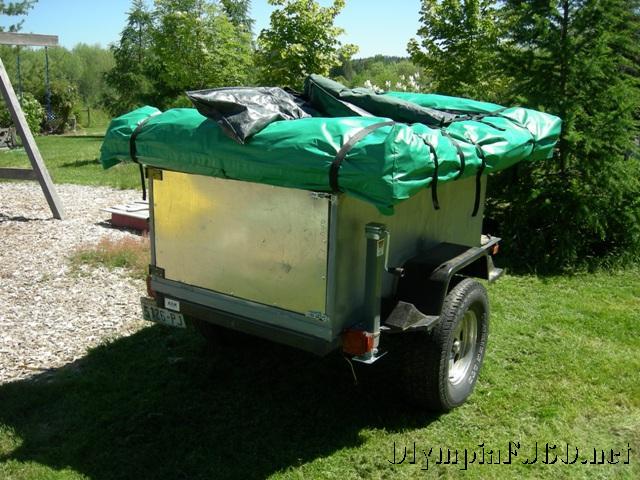
Getting ready for a few camping trips I decided to update a several items on the trailer.
The first was to install a door for a little more storage space and so I can check on the batter charge condition without having to open the top and remove the inside shelf. I was able to find the correct size hatch on Ebay for a reasonable price.
I also installed an outdoor shower box for rinsing off and the occasional shower. I also have a shower enclosure and use the solar shower bag. I like using the bag because it prevents any one from over using the water. The shower will be plumbed into the lines going to the sink in the rear.
I also wanted to add propane bottle bracket. I kept looking (as others have) for the correct solution for my trailer. I was going to use the XL Quick Fists as they have and extremely high rating, but I decided I wanted the primary tank on the tongue rather than against the box. I ended up bending some 2″x 3/16″ strap on my harbor freight bender. Making 90* bends is about all I use it for and it does the job well. I made a 1/4 cage crossed with a full cage that is hinged on the top and uses a heavy locking clasp. It is bolted to the tongue.
For the spare tank I used the XL quick fist straps. They are just big enough for the smaller tanks and hold it quite well.
The last thing I did before the trip is the installation of the under body water tank and gray water tank. This opened up considerable storage space and lower the COG even more, as well as move the water weight centered over the axle.
The water tank is just a basic unbaffled 20 gallon tank. All fittings are customizable. I just put a vent, drain and fill fitting.
.
The tank was fitted up for marking holes then temporarily strapped up with plastic plumbers tape.
For the waste tank I decided to use a standard RV drain valve. Time will tell if this was a good idea. It sits pretty tight up to the frame behind the spring shackle. This tank came pre-molded with a 3″ drain and is tapered at the back, just enough to tuck up to the rear frame member. I had a 1 1/4″ fill and 3/4 vent fitting added. I got a 3″-1 1/2″ adapter and the valve at the local RV repair store and the ABS fittings at the hardware store.
For the tank straps I used some 1/8 x 1.5 bar, added some bends for soft corners and bolted it up to the frame using the same Rivnuts I used in the decking. This is how my Land cruiser gas tank is mount so I think it will be adequate for the trailer.
There is just about the same amount of room between the bump stops and the springs as there is between the axle tube and the tank. I may add a little aluminum skid shield to protect the hoses and fittings. This would be attached to the tank straps.
Here are a few pictures of the tank straps. Turned out pretty well. No sign of failure yet but the center of the water tank may need a little more support.
I was able to gain a lot of space in the trailer by moving the water tank underneath. I rearranged the batteries to help maximize this space.
Here are a few of the trailer in action on a recent camping trip to the Naches Ranger district.
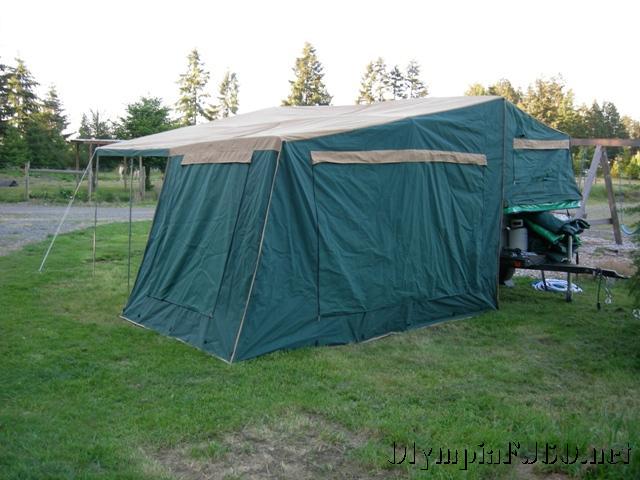
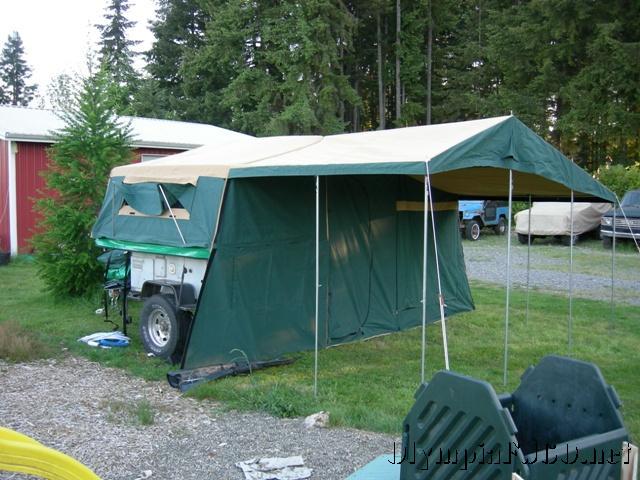
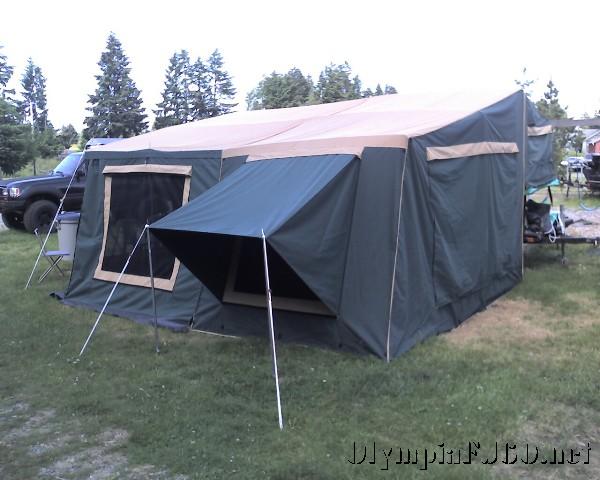
After a long search, many nights messaging back and forth with a tent maker in China and a little work to put it all together I finally have the tent I have wanted for my Off-road tent trailer. The tent is of the basic design used in much of Australia. I had a few different requirements for mine as well as features the US market may want. This first tent was also a good learning experience for international trade, ocean shipping and importation.
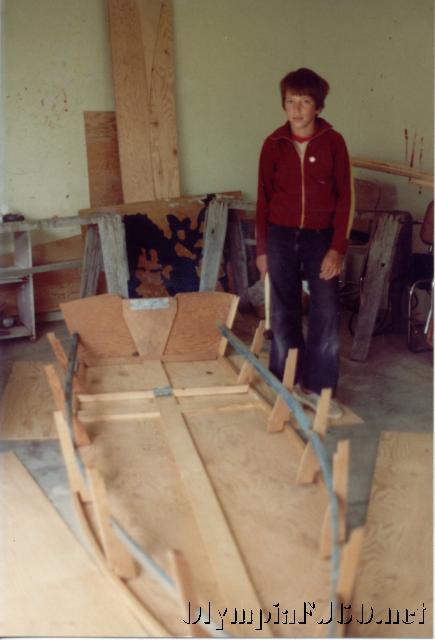
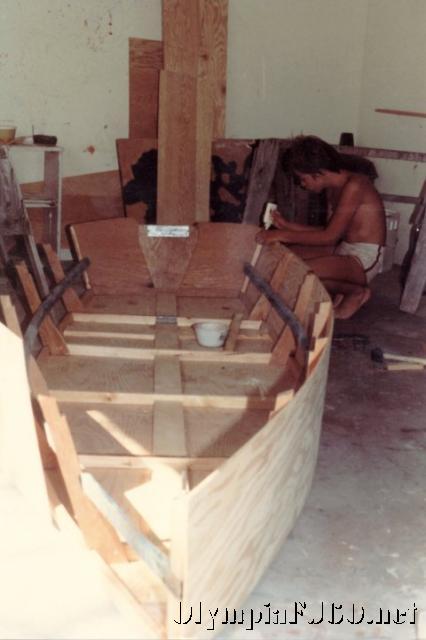
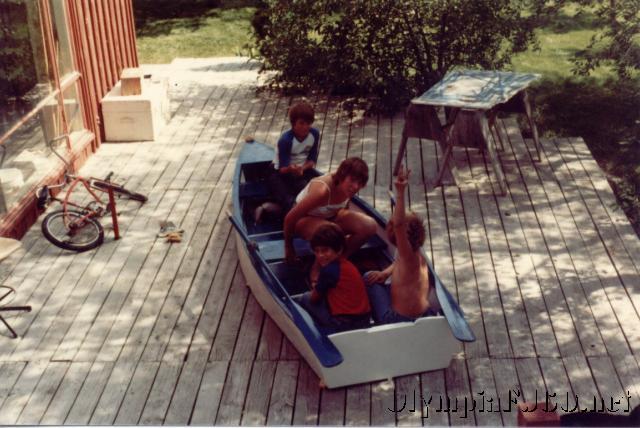
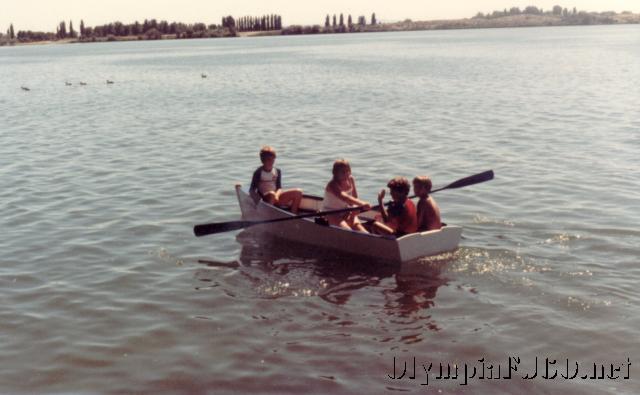
Camp Bug, this is the name to the entire tent trailer project by my son. He has heard the story and seen the pictures of the boat I build with my father when I was about 10. It was a remake of an older boat my siblings had used. The boats original name Sea Bug and we christened the newly built boat the Sea Bug II. Here are a few pictures of the Sea Bug II.
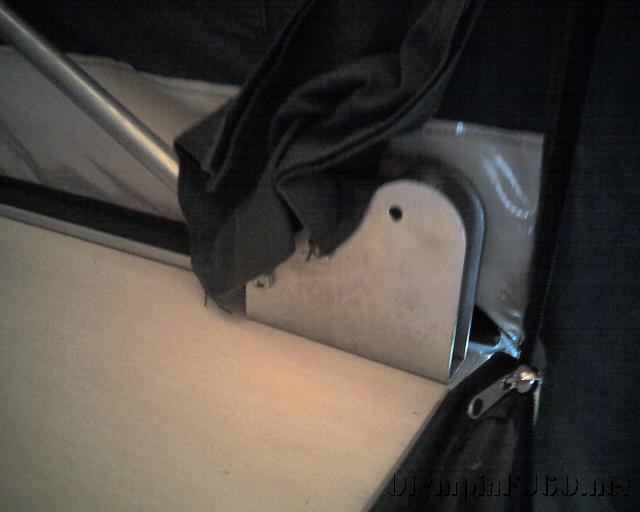
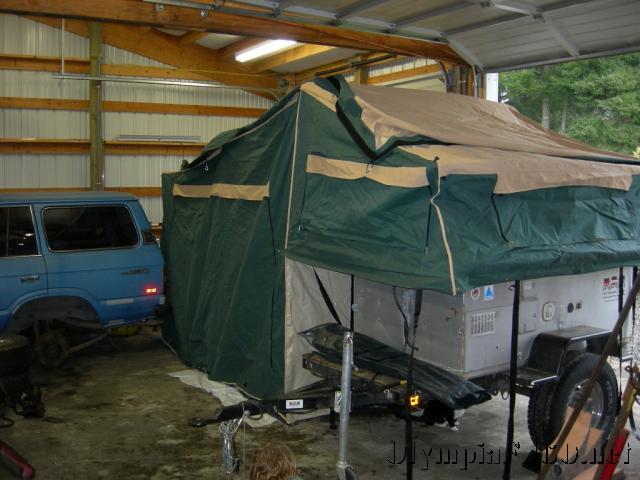
Back to the Tent and Camp Bug I. After much work, a little retrofitting and a little beefing up I was able to attach the tent to the trailer. It uses three hinges to hold it to the trailer. It has two left handed and one right handed lift off hinges. The right handed hinge is in the center and acts as the lock. Half of the center hinge is bolted to the trailer. The rest of the hinges are welded to the trailer and tent base. This makes it possible to remove the tent from the trailer if need be. To hold the folded tent up while loading I started out with two 120 lbs gas lift struts. This works once the base is completely extended, but does nothing to help lift it. With the tent and base weighing in and near 350 lbs I think I need a little help. I will try a pair of 200 or 250 lbs struts and see if that does the job.
The tent wasn’t difficult for me to set up by my self the first time, but two people will be helpful. I started by removing the cover, removing and setting aside all the poles, guide lines, stakes and awning (annex) walls. Next I pulled the tent off the trailer spreading the PVC floor out as tight as I could. This also pulled the two ground length internal poles off the trailer.
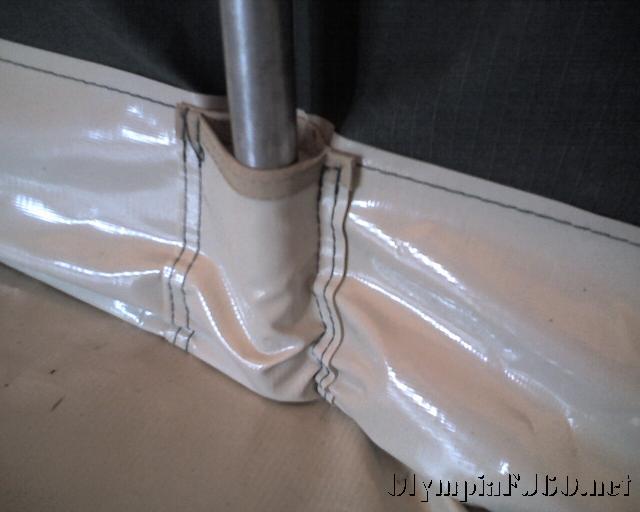
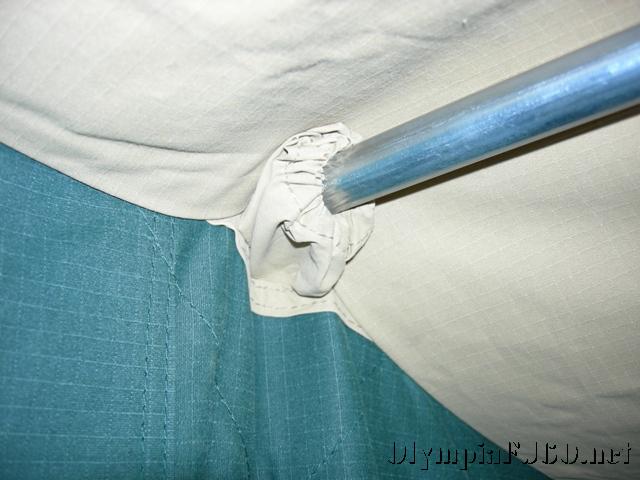
Once the floor is staked down, I went inside and put the ground length poles into their pockets in the walls. The poles are extended until the roof is tight. The two poles that are attached to the base also need to be extended.
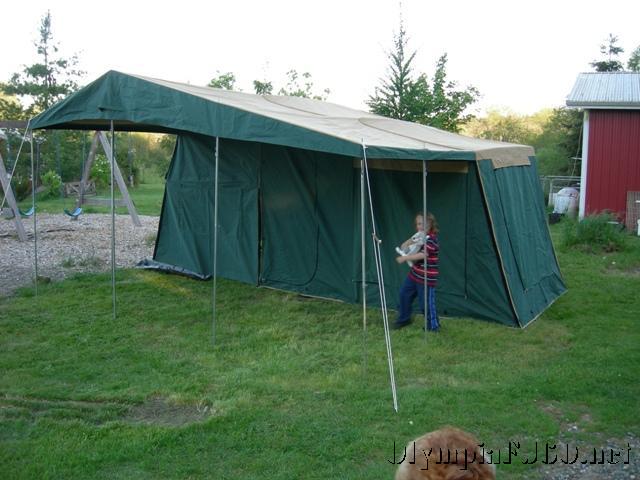
The annex uses it’s own set of poles. Setting this up was the hardest part of the setup. It helps to have a second person to hold one of the poles as you attached the rest of the structure. Four poles attach through the tent wall to the inside pole structure.
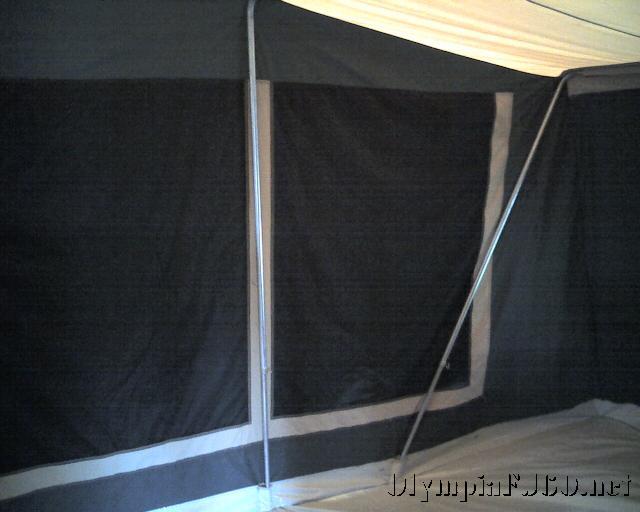
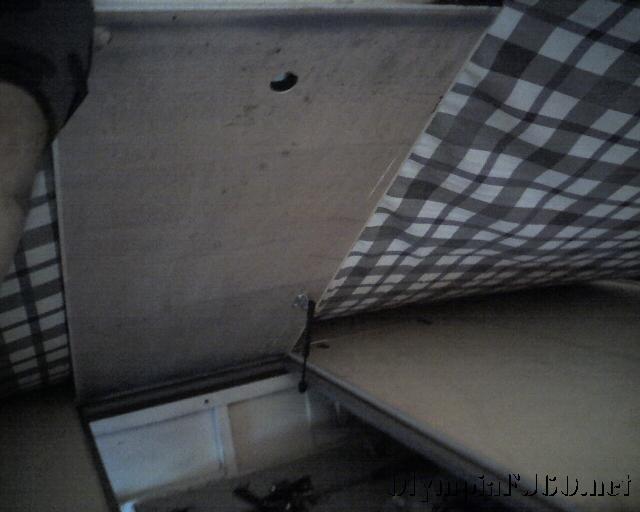
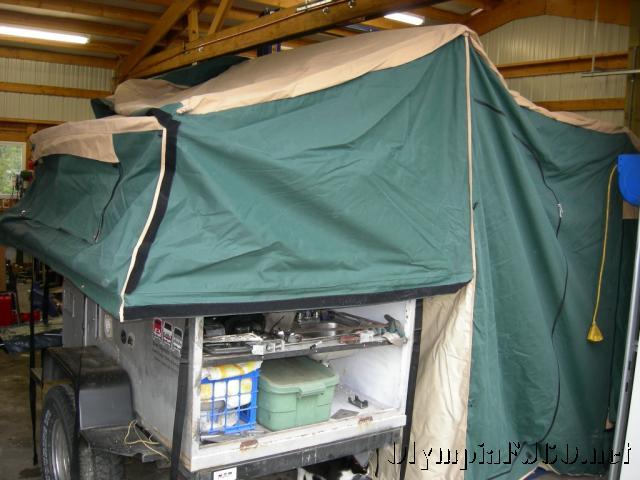
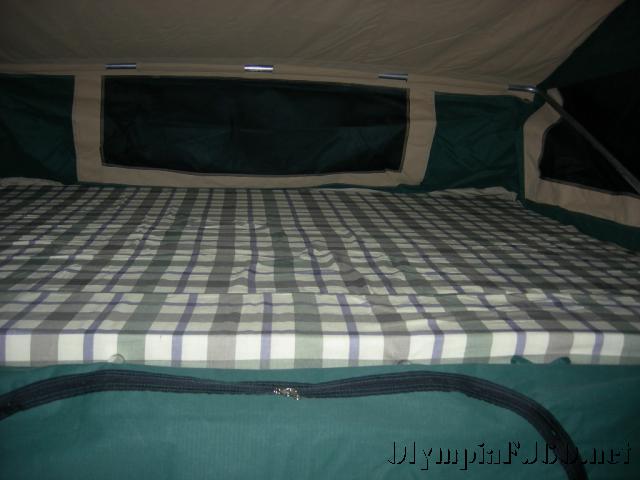
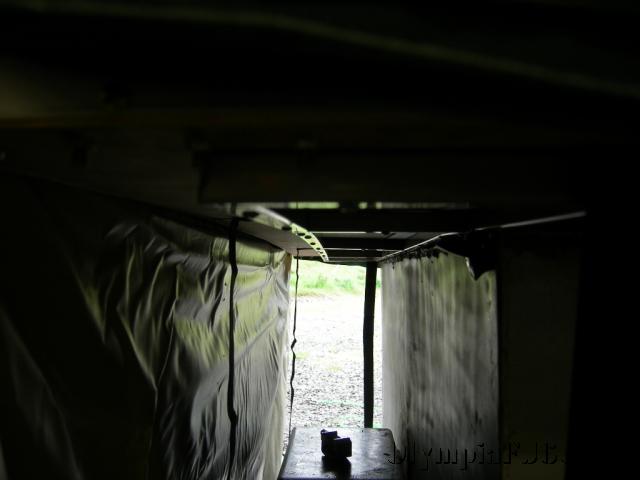
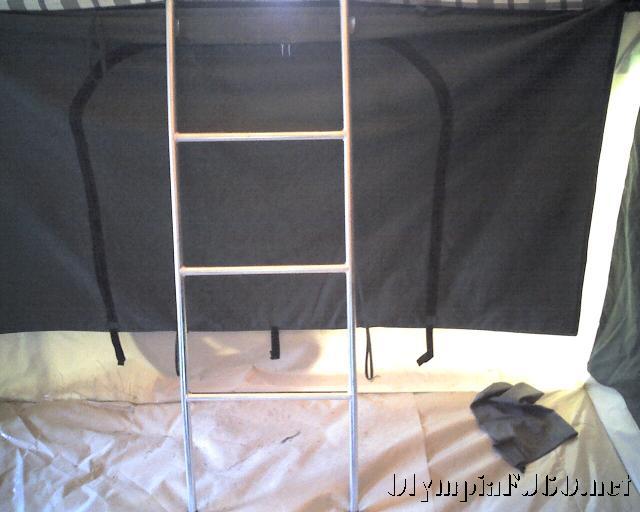
The tent comes with a ladder to get up onto the bed. The bed consist of a 3″ thick foam pad roughly the size of a queen sized bed. Under the bed are two hatches for easy access to items that are stored inside the trailer.
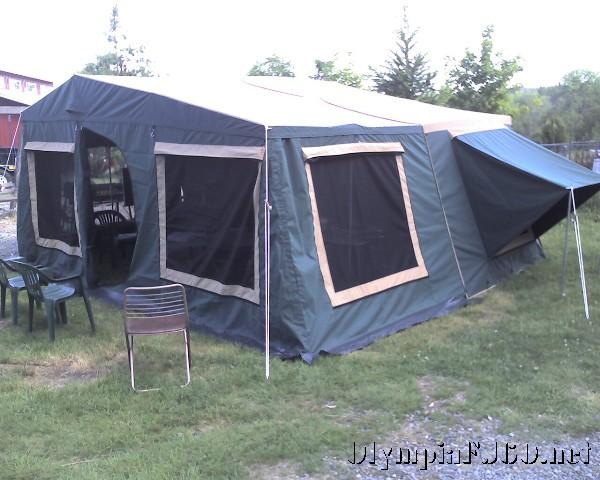
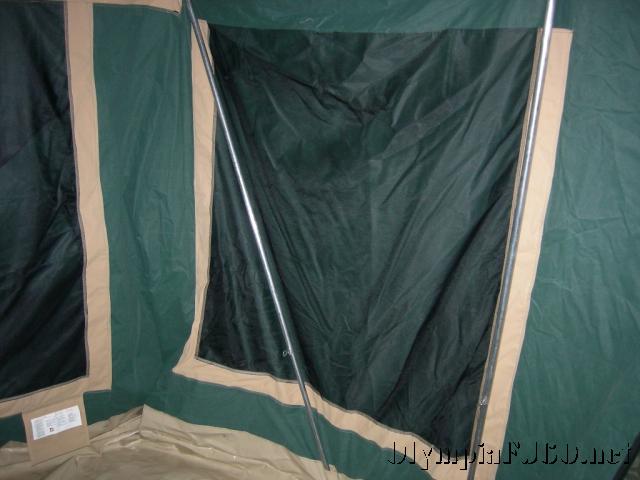
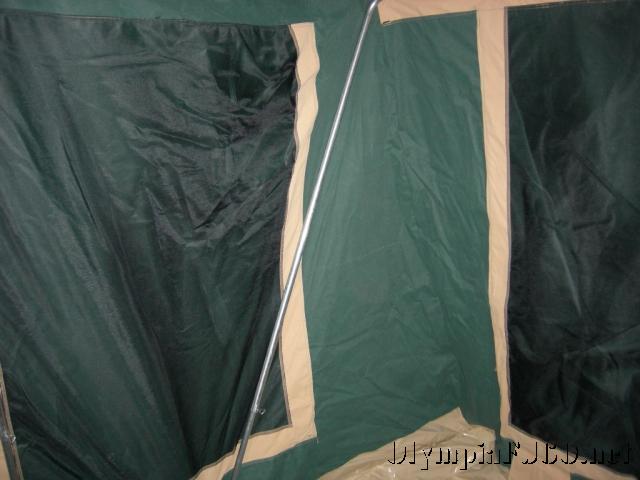
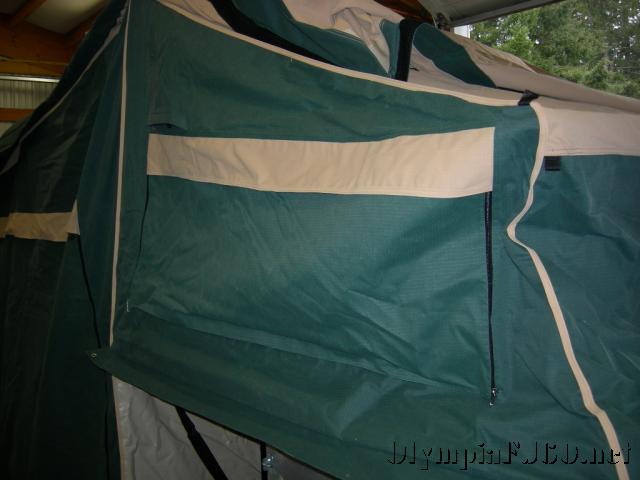
The walls for the annex are as simple as attaching the three panels together and to the tent with their Velcro strips.  Fully deployed, the tent has two windows with rain covers and six windows that can role up. All windows as well as the two doors have mosquito netting to keep bugs out.
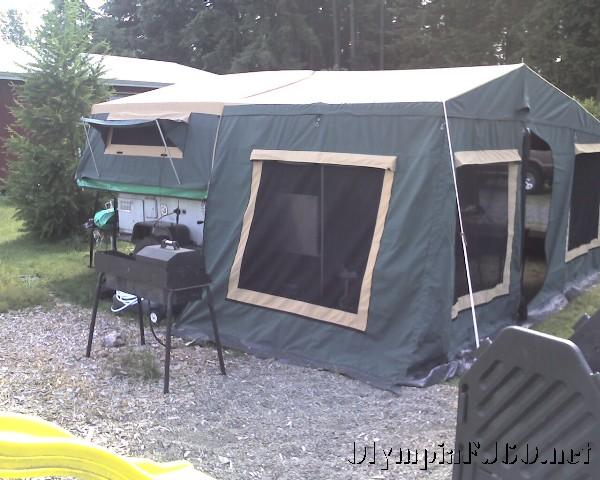
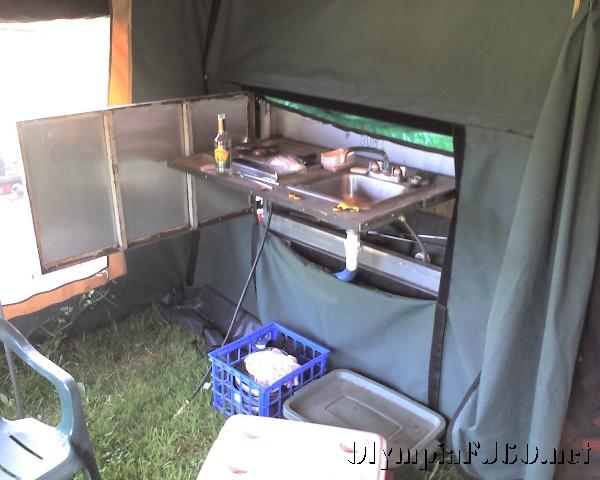
The Kitchen slides out through the opening in the tent panel at the back of the trailer.
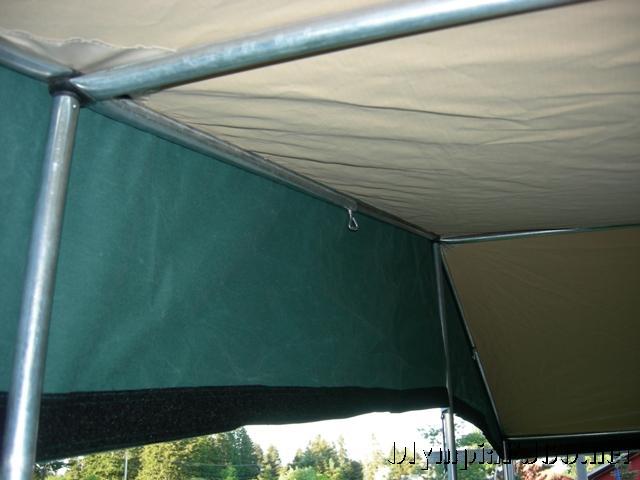
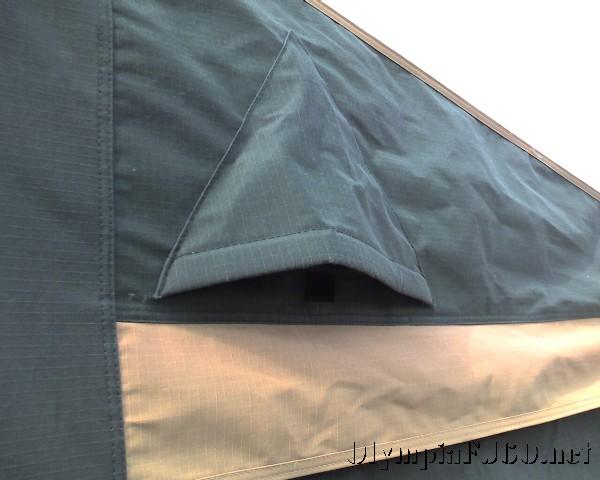
The roof vents, there is one in each outer end of the tent.
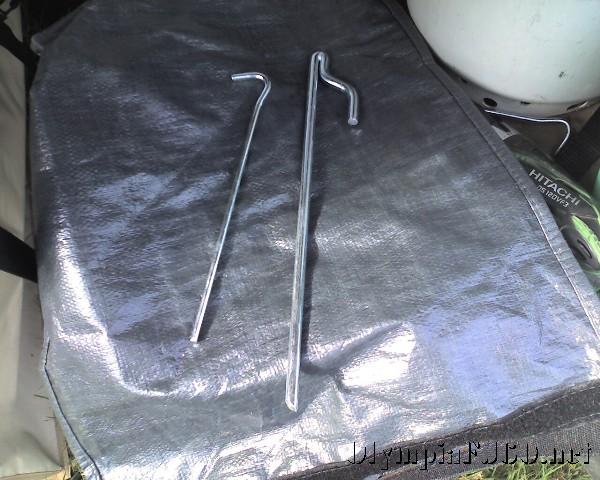
And the tent stakes. There is a set of the standard size metal stakes as well as an extra heavy duty style that is about 3/8″ thick.
The tent can be mounted on most any trailer smaller than 90″ long x 66″ wide. A custom mounting frame may be needed. For questions or more information on the trailer tent, please contact me or submit a post on the East Olympia Cruisers website or download the [download id=”2″].
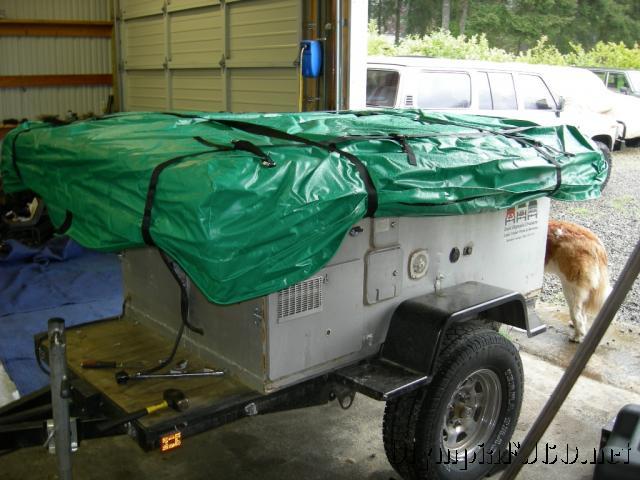
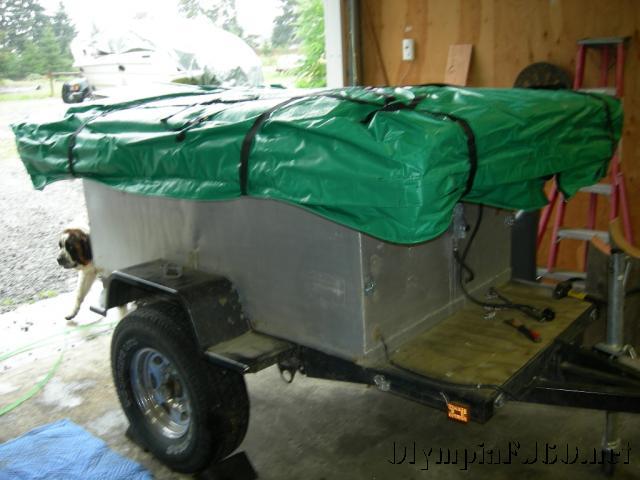
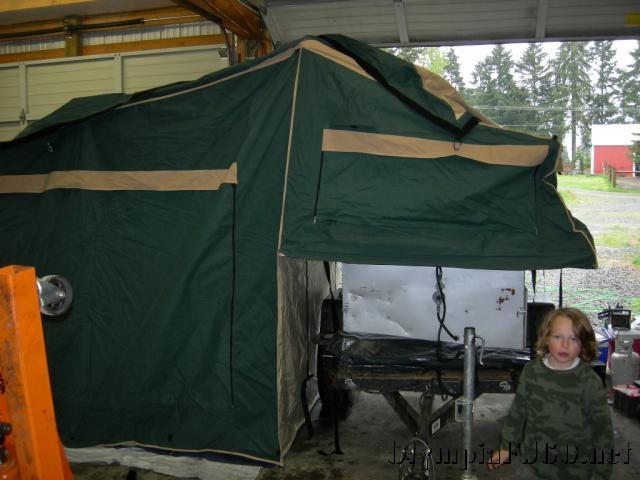
The trailer tent has arrived. I set it up quickly or some pictures and get a first impression. Of course it was raining so I had to set it up in the shop. I was not able to open the annex and install the walls but the main tent fit (just barely) and I like what I see so far. Well made with heavy sippers and double seams. I have some questions on the travel cover but everything else looks pretty good. Now I just have to figure out how I’m going to mount it to the trailer. I think a bit of extra bracketry is required and will have to pack the tent back up and flip it over to get a better idea. I will get more pictures one I get it permanently mounted and can set it up outside.
My minimum order is 10, so I think 5 people and I will have to nearly full price. If I can get 8 or more, I will be able to give about 20% discount I think. If you are interested in being part of the initial order please let me know by using the contact form.
Still waiting on ocean shipping rates. Also looking into the need for fire retardant fabric before I announce a price.
The size of the tent closed is 90″ (~7.5′) long, 66″ (5.5′) wide and between 6″-12″ tall. The width was selected because that is the width of my trailer outside fender to outside fender. I believe the M416 is roughly the same. The base is designed to sit 54″ off the ground. Open, the tent is 17′ wide and 15′ long (7.5′ each for main room and awning). The peak is 8′. The tent fabric is 10oz rip stop poly cotton canvas and the floor is 13oz PVC. Polls and ladder are steel. The base is 3/4″ marine grade plywood with a metal frame under for added support. There are two hatch doors in the base for easy access to trailer storage once setup. There is a 3″ foam mattress. The entire tent weighs roughly 350 lbs.
I am still working on the mounting. I am thinking of offering a mounting frame at additional expense or having the customer provide their own mounting method. The frame would fit customers trailer and have hinges, latches and struts.


