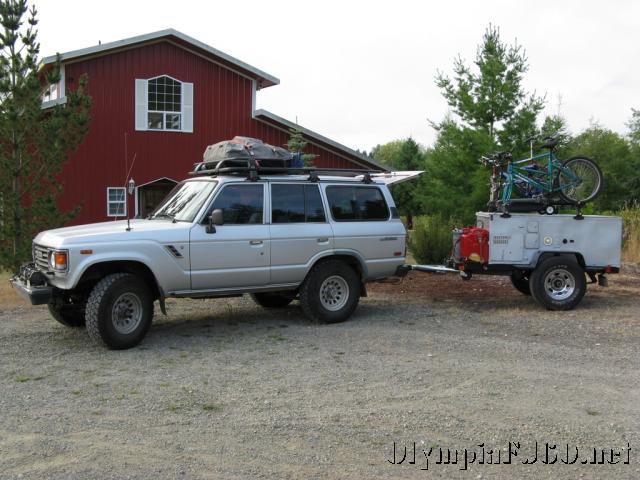
 Now that the trailer has been completed and test I thought I would finish up the trailer build with some finished pictures, a recap of features and parts used as well as a summary of the trailers performance.
We recently completed a 1625 mile trip (about 100 miles on dirt/gravel roads) to Idaho. The full write-up is HERE.
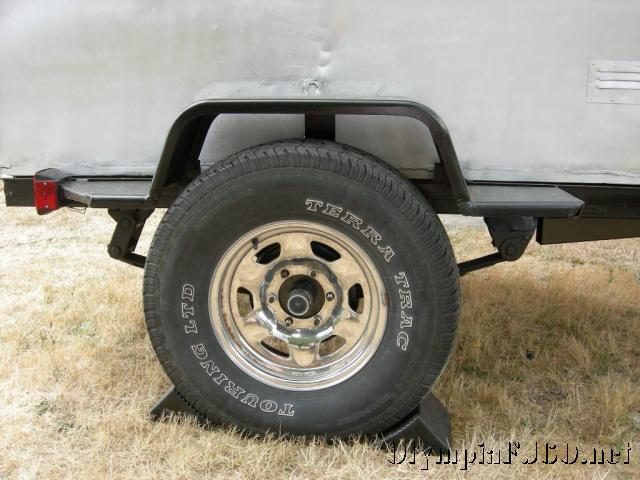 The only changes I need to do to the trailer is to change the axle from spring under to spring over. Once fully loaded with water, camping gear, extra fuel and bikes (or tent in the future) I have very little travel left between the bump stops and in the fenders. It will also allow for slightly larger tires. Here it is with 31″ tires. I would like to fit 34″ tires to match the Land Cruisers.
 The next area of improvement would be lid strength and stronger struts. With the bikes on top it was very difficult to lift. The lid also flexes. If there are not two people to lift it is almost impossible.
Features that need to be added still are fuel can holders. I picked up a pair of J Cans from Expedition Exchange.
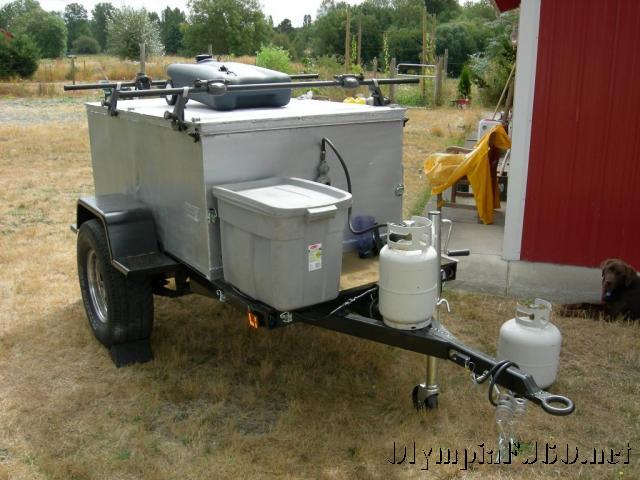 I also need to add some brackets to hold the propane tanks but I haven’t decided on the size of tank. Right now I have one 11# tank it it was more than enough for a week of camping with cooking and hot water. I don’t think there is a need for a 2o# tank. The current plan is to mount the tank on the tongue using a bracket similar to the ones used on the Fleetwood tent trailers.
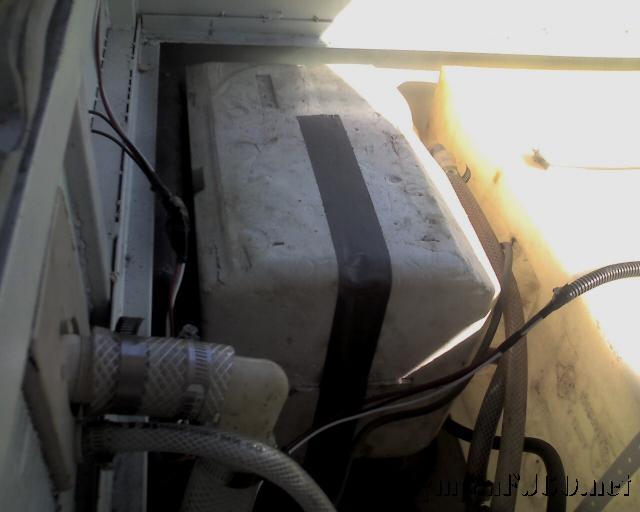
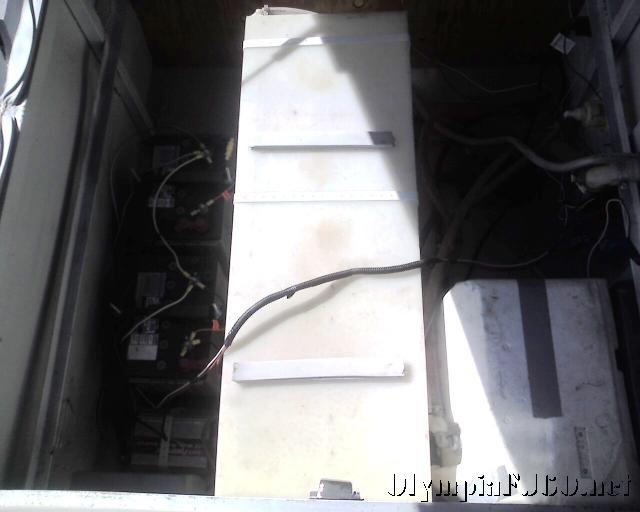
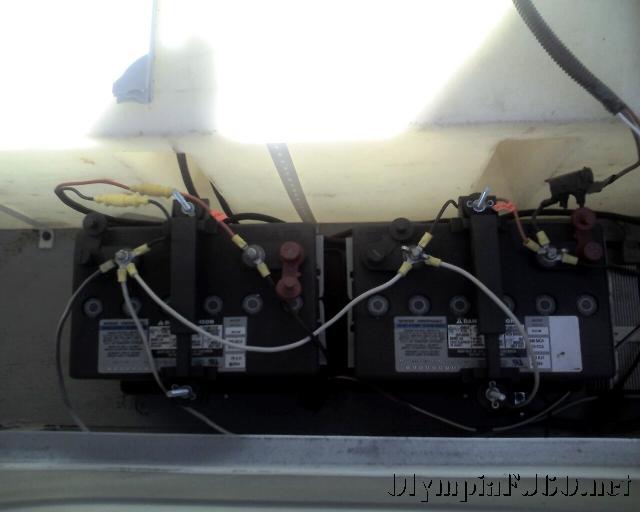
Pictures of the interior of the trailer. I used AGM batteries for safety and reliablility (like optima just no spiral).
When at a campground our at home, I use a trolling motor charger to keep the batteries topped off. When driving I charge through the vehicle using a hellroaring battery isolator I installed as part of my Dual battery setup into an 87 FJ60 | OlympiaFJ60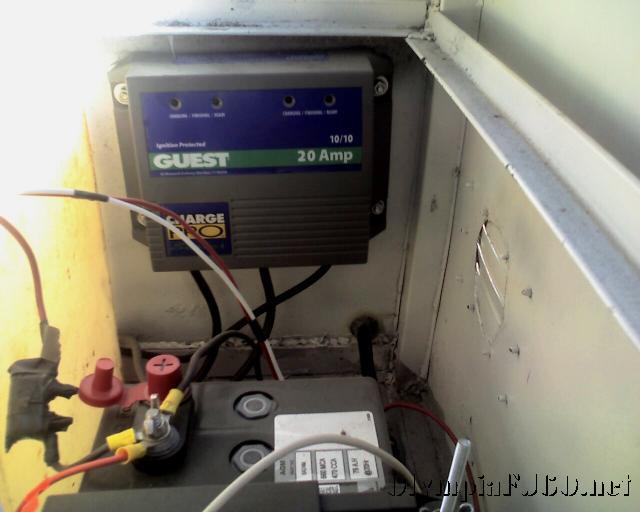
The back of my power box. I used circuit breakers from the batteries to the power. One battery is for the water pump and lights. The second batter is for the inverter.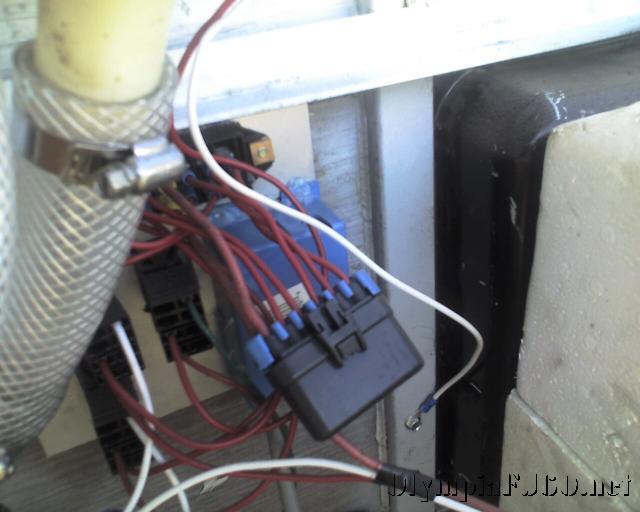
For the inverter I just used a 400 watt inverter I had wired with a relay to switch on and off from the switch panel.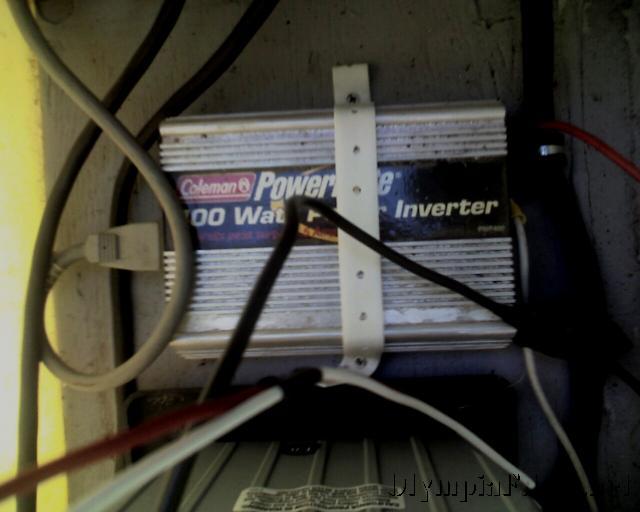
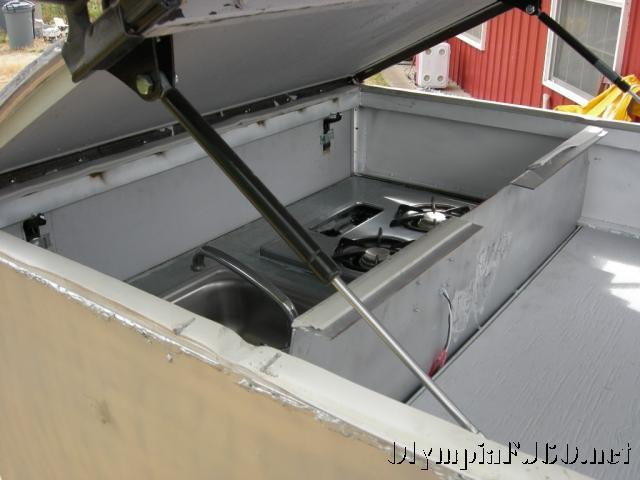
Here is a shot of the water heater. You can see how much space this thing takes up. I think in my next trailer I will use the on demand type heater instead. The second picture is off the whole inside. The water tank is the other item I would change. It is too tall. I think a wider but more flat one would work better for storage space. Even with the limited space I am able to carry the camp table, chairs, tent and shower/toilet enclosure.